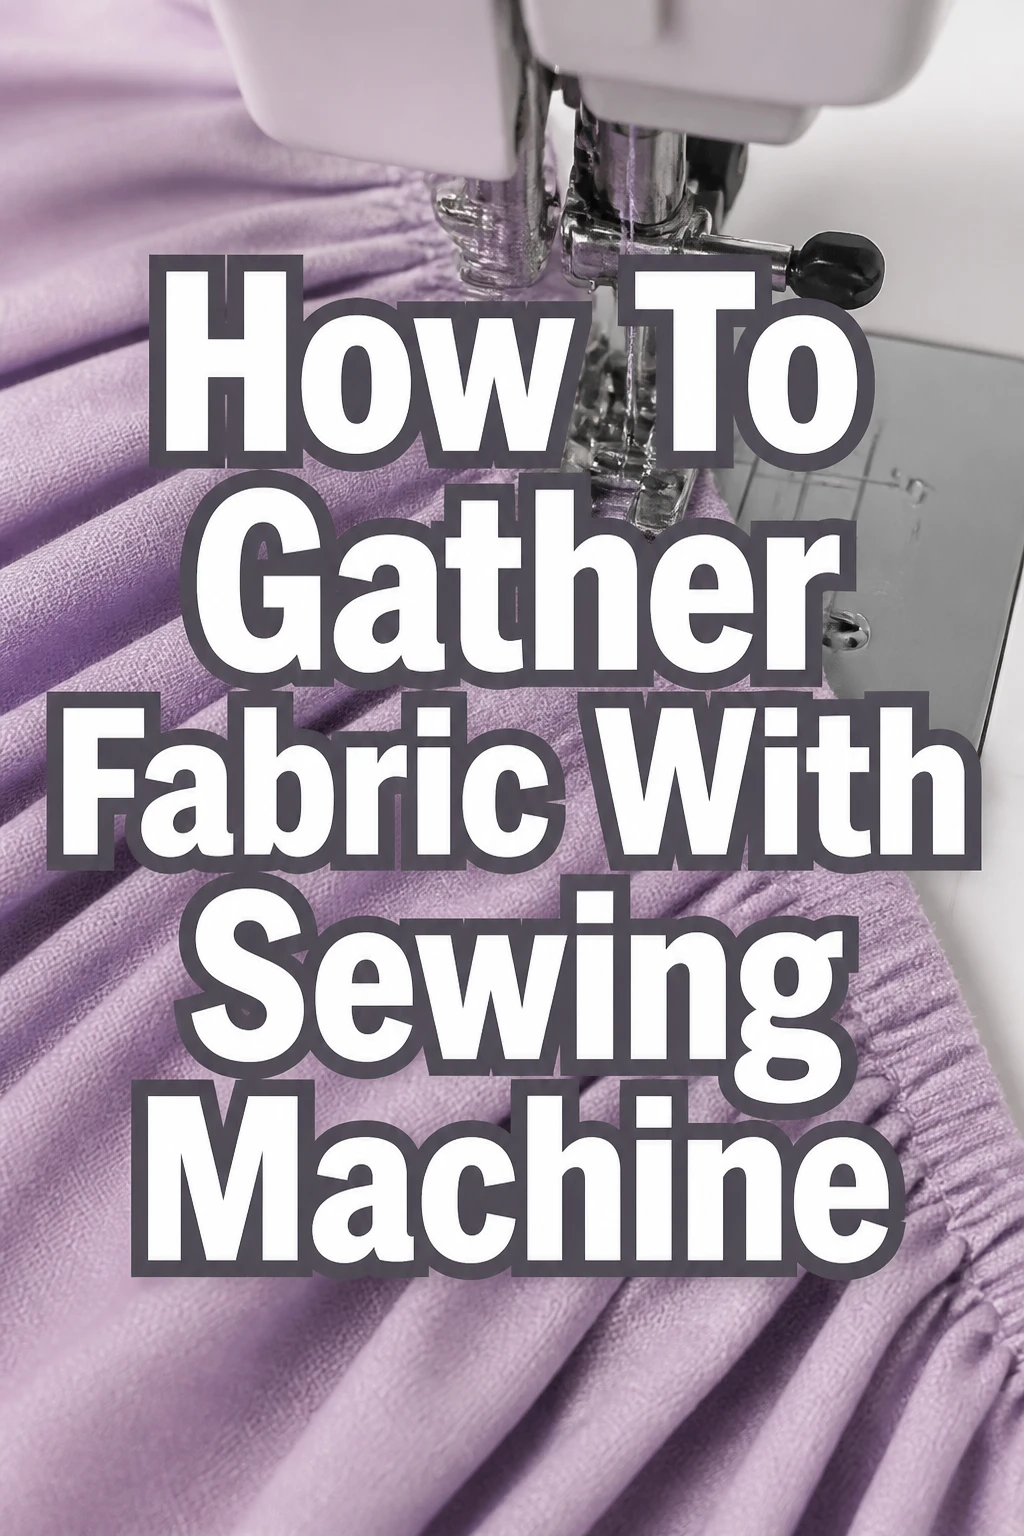
How To Gather Fabric With Sewing Machine
I remember the first time I tried to make a ruffled skirt for my niece.
I ended up with a tangled mess of broken threads and uneven bunches because I did not understand the mechanics of my sewing machine.
After years of sewing garments and home decor, I have mastered several techniques that make gathering fabric a stress-free part of the creative process.
Quick Overview
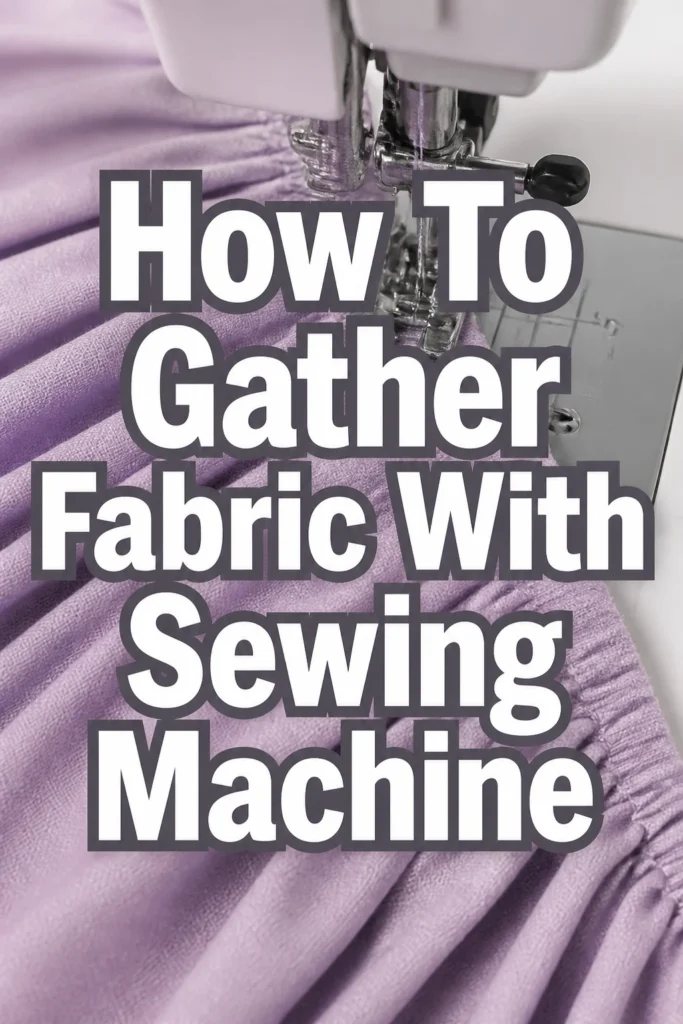
Gathering fabric involves sewing long stitches and pulling the threads to create beautiful, even ruffles or soft folds.
- Time needed: 15 to 30 minutes
- Difficulty: Beginner
- What you will need: Sewing machine, all-purpose thread, fabric, pins, and a seam ripper.
Step 1: Prepare Your Fabric
Iron your fabric thoroughly before you begin any sewing.
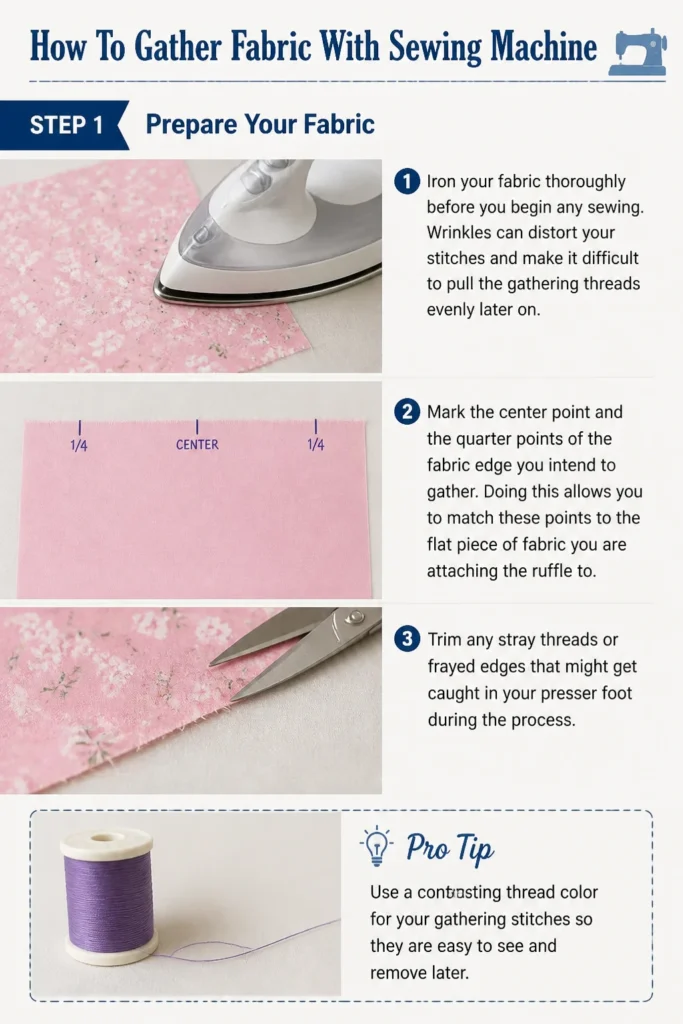
Wrinkles can distort your stitches and make it difficult to pull the gathering threads evenly later on.
Mark the center point and the quarter points of the fabric edge you intend to gather.
Doing this allows you to match these points to the flat piece of fabric you are attaching the ruffle to.
Trim any stray threads or frayed edges that might get caught in your presser foot during the process.
Pro Tip: Use a contrasting thread color for your gathering stitches so they are easy to see and remove later.
Step 2: Adjust Your Machine Settings
Change your stitch length to the longest setting available on your sewing machine.
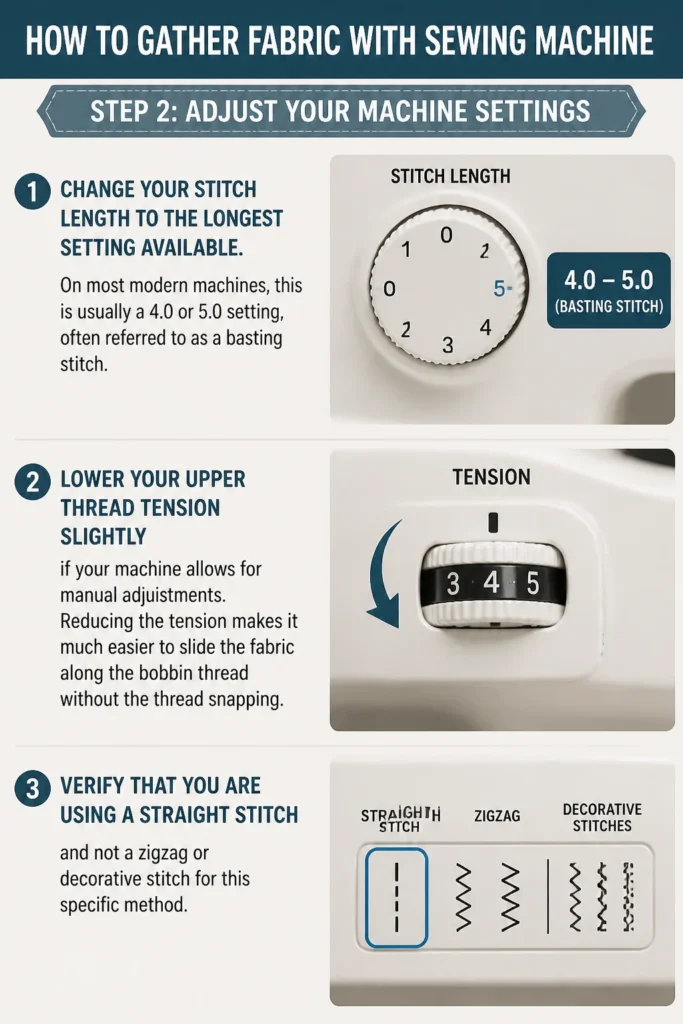
On most modern machines, this is usually a 4.0 or 5.0 setting, often referred to as a basting stitch.
Lower your upper thread tension slightly if your machine allows for manual adjustments.
Reducing the tension makes it much easier to slide the fabric along the bobbin thread without the thread snapping.
Verify that you are using a straight stitch and not a zigzag or decorative stitch for this specific method.
Step 3: Sew the First Row of Basting Stitches
Position your fabric under the presser foot so that you are sewing about one-quarter inch from the raw edge.
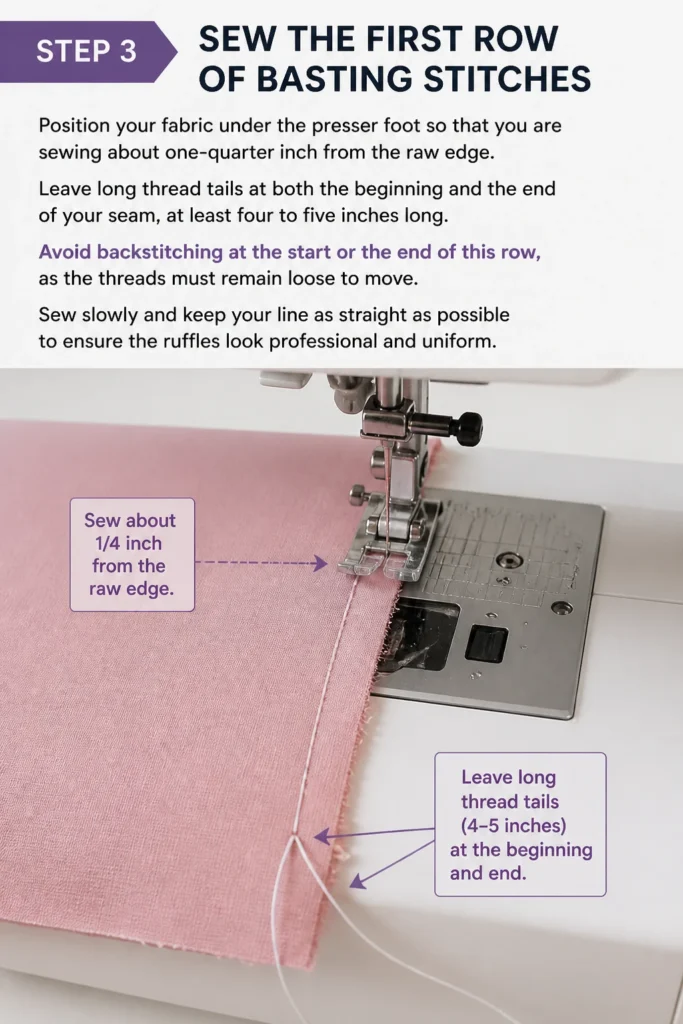
Leave long thread tails at both the beginning and the end of your seam, at least four to five inches long.
Avoid backstitching at the start or the end of this row, as the threads must remain loose to move.
Sew slowly and keep your line as straight as possible to ensure the ruffles look professional and uniform.
Step 4: Sew the Second Row of Basting Stitches
Place a second row of long stitches about one-quarter inch away from your first row.
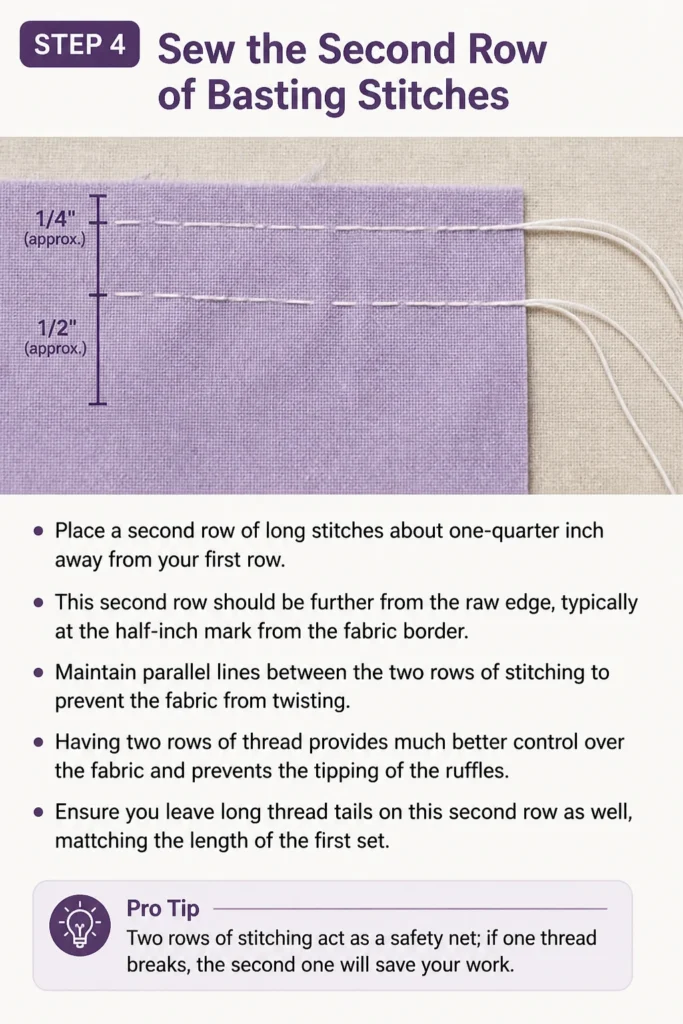
This second row should be further from the raw edge, typically at the half-inch mark from the fabric border.
Maintain parallel lines between the two rows of stitching to prevent the fabric from twisting.
Having two rows of thread provides much better control over the fabric and prevents the “tipping” of the ruffles.
Ensure you leave long thread tails on this second row as well, matching the length of the first set.
Pro Tip: Two rows of stitching act as a safety net; if one thread breaks, the second one will save your work.
Step 5: Secure One End of the Threads
Grasp all four threads at one end of your fabric piece once both rows are finished.
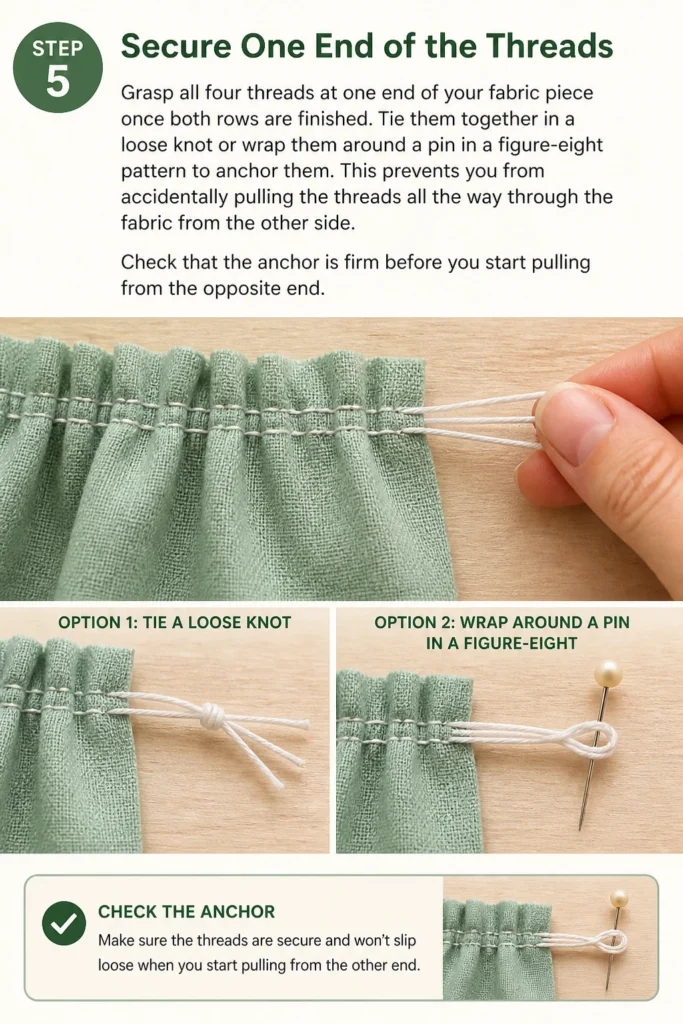
Tie them together in a loose knot or wrap them around a pin in a figure-eight pattern to anchor them.
This prevents you from accidentally pulling the threads all the way through the fabric from the other side.
Check that the anchor is firm before you start pulling from the opposite end.
Step 6: Pull the Bobbin Threads
Identify the two threads on the back of the fabric, which are the bobbin threads.
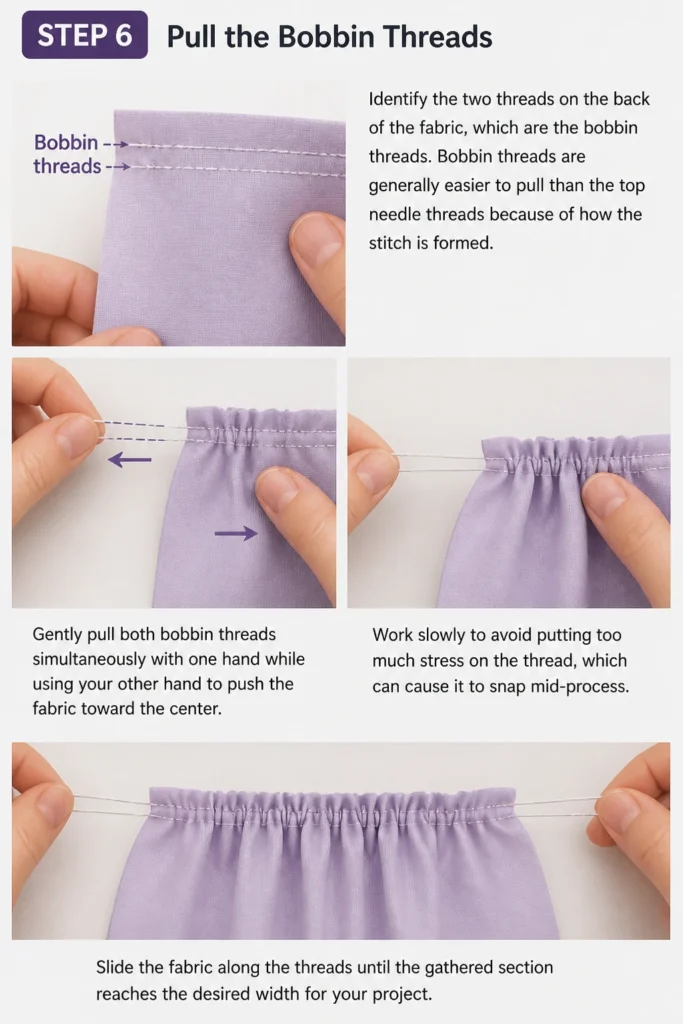
Bobbin threads are generally easier to pull than the top needle threads because of how the stitch is formed.
Gently pull both bobbin threads simultaneously with one hand while using your other hand to push the fabric toward the center.
Work slowly to avoid putting too much stress on the thread, which can cause it to snap mid-process.
Slide the fabric along the threads until the gathered section reaches the desired width for your project.
Step 7: Distribute the Gathers Evenly
Spread the bunched-up fabric along the threads until the ruffles look uniform across the entire length.
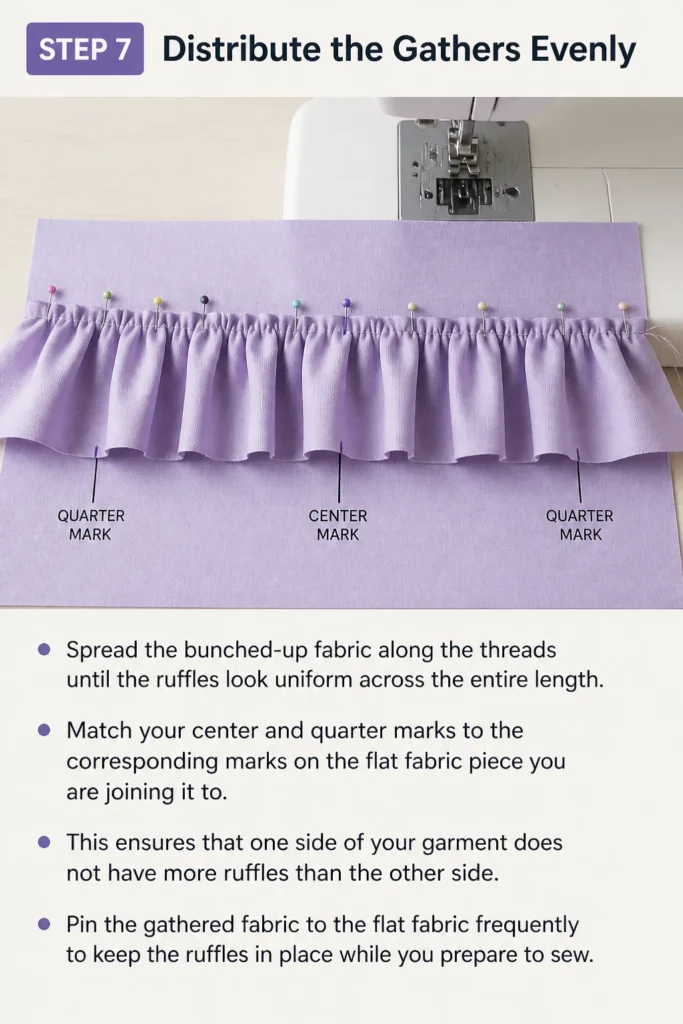
Match your center and quarter marks to the corresponding marks on the flat fabric piece you are joining it to.
This ensures that one side of your garment does not have more ruffles than the other side.
Pin the gathered fabric to the flat fabric frequently to keep the ruffles in place while you prepare to sew.
Step 8: Perform the Final Stitching
Adjust your sewing machine back to a standard stitch length, usually around 2.5.
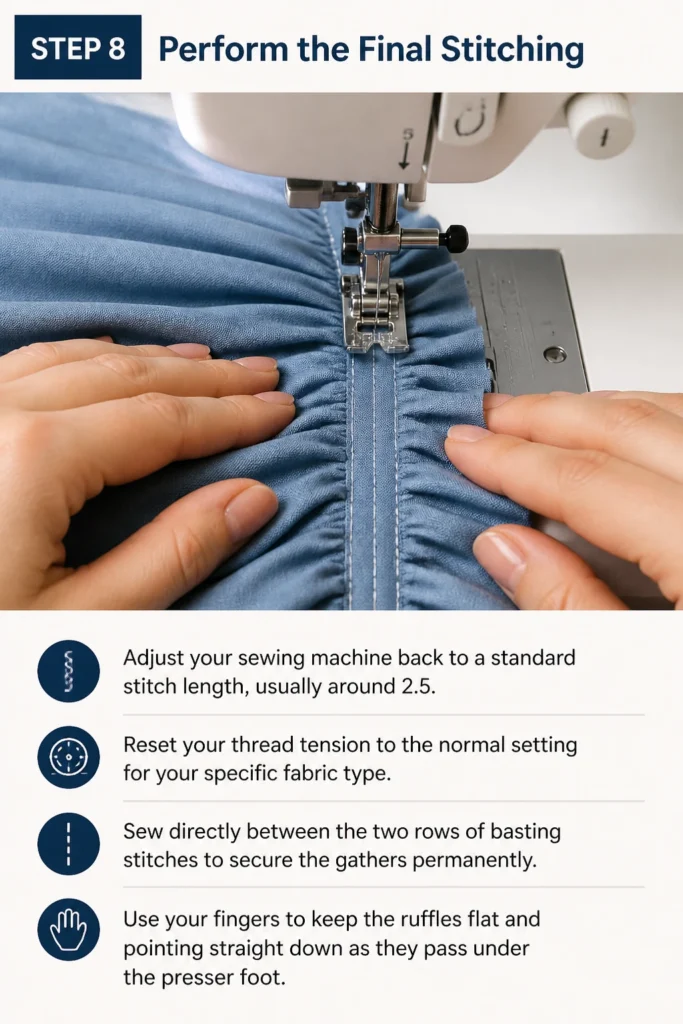
Reset your thread tension to the normal setting for your specific fabric type.
Sew directly between the two rows of basting stitches to secure the gathers permanently.
Use your fingers to keep the ruffles flat and pointing straight down as they pass under the presser foot.
Step 9: Remove the Basting Stitches
Locate the long basting stitches that are visible on the outside of your seam line.
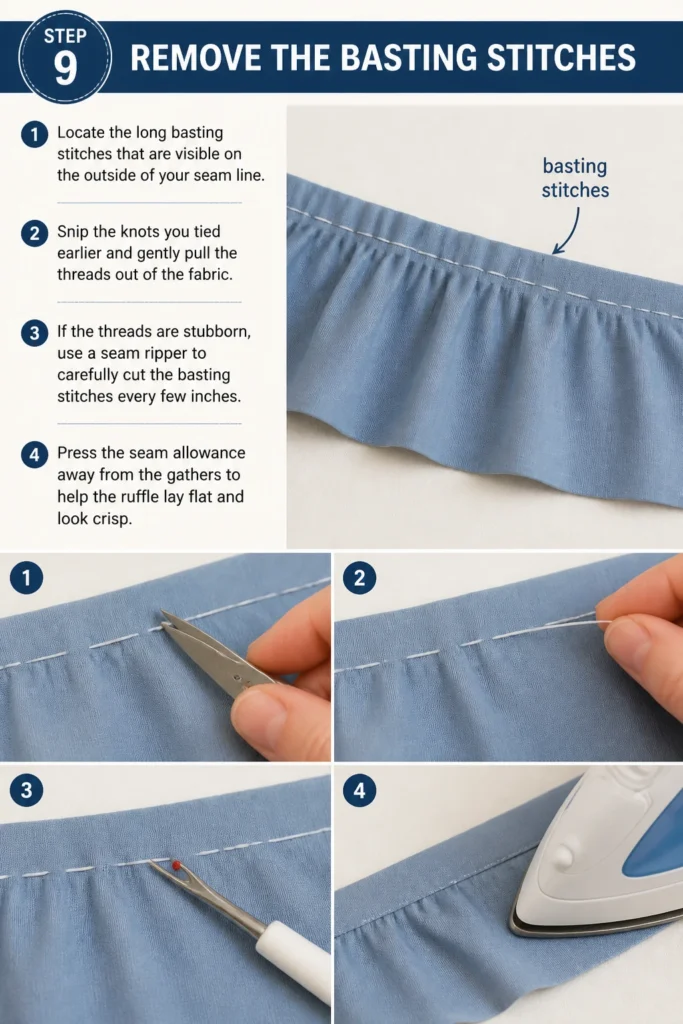
Snip the knots you tied earlier and gently pull the threads out of the fabric.
If the threads are stubborn, use a seam ripper to carefully cut the basting stitches every few inches.
Press the seam allowance away from the gathers to help the ruffle lay flat and look crisp.
Common Mistakes to Avoid
Pulling the Top Threads Instead of Bobbin Threads
The top thread is looped through the fabric and creates more friction than the bobbin thread. If you try to pull the top threads, you will likely find that the fabric resists moving or the thread snaps almost immediately. Always look for the threads on the underside of your work to make the gathering process smooth.
Using a Short Stitch Length
A short stitch length creates too many intersections between the top and bottom threads. This makes it nearly impossible for the fabric to slide along the thread. Always maximize your stitch length to ensure there is enough space for the fabric to move freely.
Forgetting to Leave Long Thread Tails
If your thread tails are too short, they can easily get sucked into the fabric as you begin to gather. This forces you to pick out the stitches and start the entire process over. Always leave at least five inches of thread at each end to give yourself plenty of room to work.
Skipping the Second Row of Stitching
Many beginners try to save time by only sewing one row of basting stitches. This often results in ruffles that look messy or slanted because the fabric has no stability. Two rows of stitching keep the fabric edge perpendicular to the seam, resulting in a professional finish.
Troubleshooting
The Gathering Thread Snaps Mid-Way
If your thread breaks while you are pulling it, you cannot easily tie it back together. You will need to remove the broken row of stitching and sew a new basting line. To prevent this, use a high-quality polyester thread and pull with very gentle, consistent pressure.
The Ruffles Are Uneven or Bunched
This usually happens when the fabric is not distributed properly before the final stitch. Take the time to use your fingers to wiggle the ruffles along the thread until they look identical across the piece. Using pins every inch can help hold that perfect distribution in place as you sew.
The Fabric Won’t Slide Along the Thread
Check your machine tension if the fabric feels stuck. If the tension is too high, the stitches are too tight against the fabric fibers. You might also be accidentally pulling one top thread and one bobbin thread, which locks the stitch in place.
Key Takeaways
- Always use the longest stitch length your machine provides for gathering.
- Sew two parallel rows of basting stitches for maximum control and stability.
- Pull the bobbin threads rather than the needle threads to move the fabric easily.
- Mark your center and quarter points to ensure even distribution of ruffles.
- Use a standard stitch length and normal tension for the final attachment seam.
- Remove visible basting stitches after the project is secured to maintain a clean look.
Frequently Asked Questions
Can I gather heavy fabrics like denim with this method?
Standard basting stitches can work on medium-weight fabrics, but very heavy denim might cause the threads to snap. For heavy materials, you should consider the zigzag-over-cord method. This involves sewing a zigzag stitch over a piece of strong kitchen twine or dental floss, then pulling the cord to gather the heavy fabric.
Is it necessary to change the thread tension?
While not strictly mandatory on every machine, lowering the tension is highly recommended. It reduces the grip the threads have on the fabric. This small adjustment can be the difference between a successful gather and a broken thread that ruins your progress.
How much extra fabric do I need for a good ruffle?
The standard rule of thumb is to use two to three times the length of the finished edge. If you want a very full, dramatic ruffle, go with three times the length. For a subtle gather, 1.5 to 2 times the length is usually sufficient for most garment projects.
Should I gather the fabric before or after finishing the edges?
It is generally best to finish the raw edge with a serger or a zigzag stitch before you gather. This prevents the fabric from fraying while you are handling it and pulling the threads. However, make sure your edge finishing does not make the fabric too stiff to gather easily.
Our Top Recommended Finds
- High-Quality Polyester Thread: Polyester is stronger than cotton and less likely to snap during the pulling process.
- Glass Head Pins: These are easy to see and can be ironed over without melting, which is helpful when setting your ruffles.
- Seam Ripper with Ergonomic Grip: You will be removing a lot of basting stitches, so a comfortable tool makes the job much faster.
Mastering Your Ruffles and Gathers
Now that you understand the mechanics of gathering with your sewing machine, you can apply this to many projects.
Try creating a simple ruffled pillowcase or adding a tiered layer to a summer dress to practice these steps.
Once you are comfortable with the basic basting method, you might want to explore using a specialized gathering foot.
A gathering foot can automate this process for long lengths of fabric, which is a great next step for your sewing journey.
Pick up some scrap fabric today and practice sewing those two parallel lines to see how easy it is to create beautiful textures.