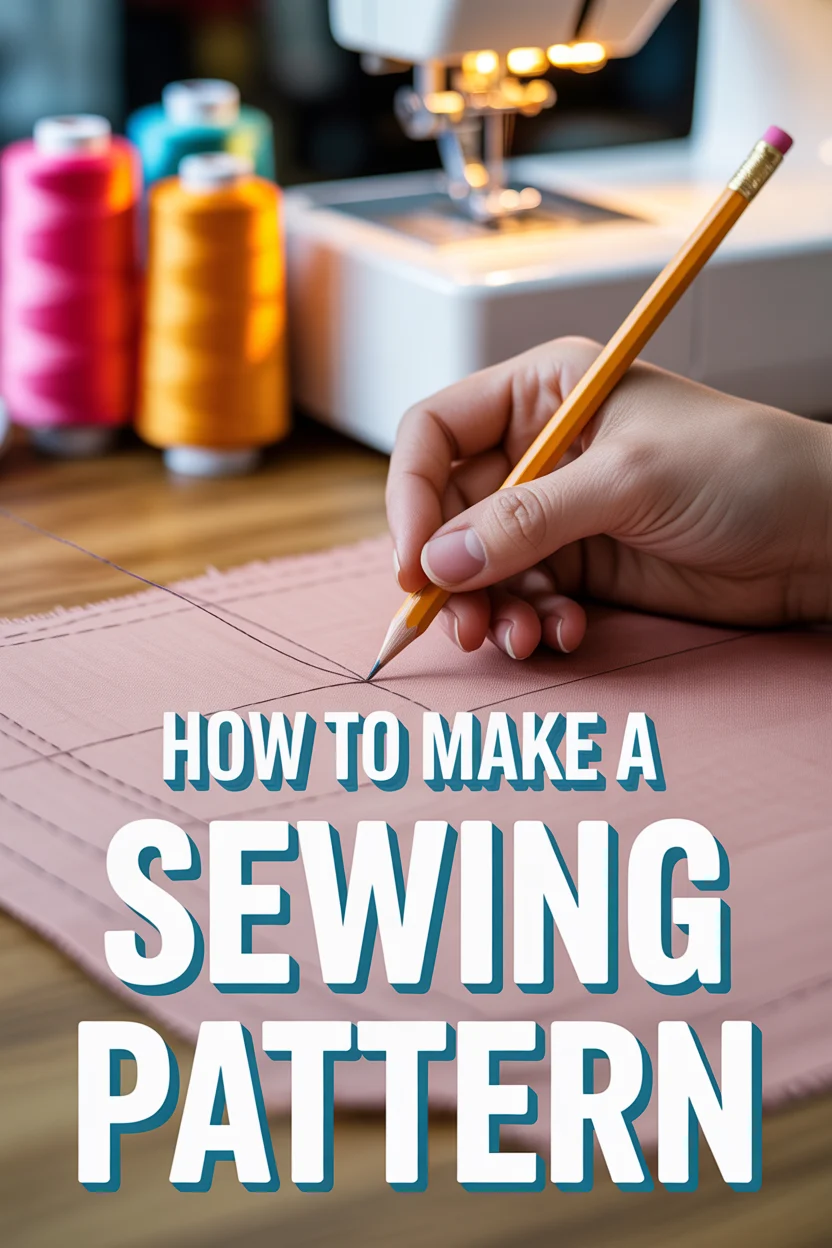
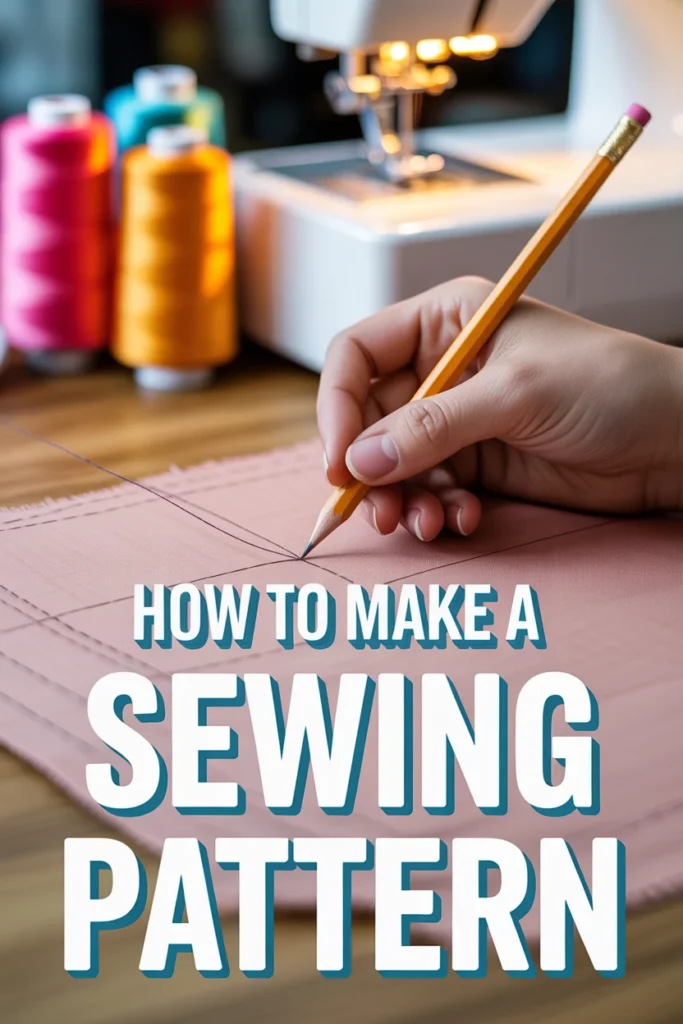
How To Make A Sewing Pattern
Learning to make your own sewing patterns opens up a world of creative possibilities.
I remember the first time I drafted a pattern for a simple skirt; the sense of accomplishment was immense, and it transformed how I approached sewing.
This guide will walk you through the practical steps, helping you bring your unique design ideas to life.
Quick Overview
You’re about to embark on a rewarding journey, creating a custom sewing pattern from scratch. This process will empower you to tailor garments perfectly to your vision and measurements.
- Time needed: 8-15 hours (spread over several sessions for drafting and testing)
- Difficulty: Intermediate
- What you’ll need: Measuring tape, paper (pattern paper or large rolls), rulers (straight and curved), pencils, eraser, scissors, fabric for a muslin, sewing machine.
Step-by-Step Instructions
Step 1: Develop Your Design Concept
Before you draw a single line, clearly visualize the garment you want to create. Think about its silhouette, style lines, neckline, sleeves, and any unique details.
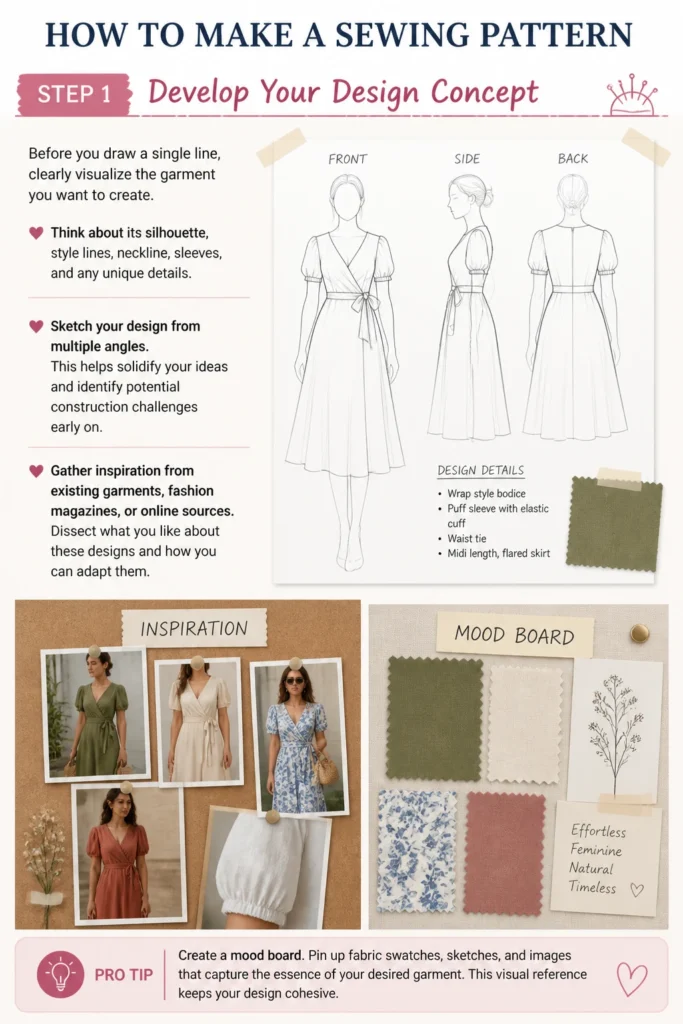
Sketch your design from multiple angles. This helps solidify your ideas and identify potential construction challenges early on.
Gather inspiration from existing garments, fashion magazines, or online sources. Dissect what you like about these designs and how you can adapt them.
Pro Tip: Create a mood board. Pin up fabric swatches, sketches, and images that capture the essence of your desired garment. This visual reference keeps your design cohesive.
Step 2: Take Accurate Measurements
Precision is paramount in pattern making. You’ll need specific body measurements for your pattern to fit well.
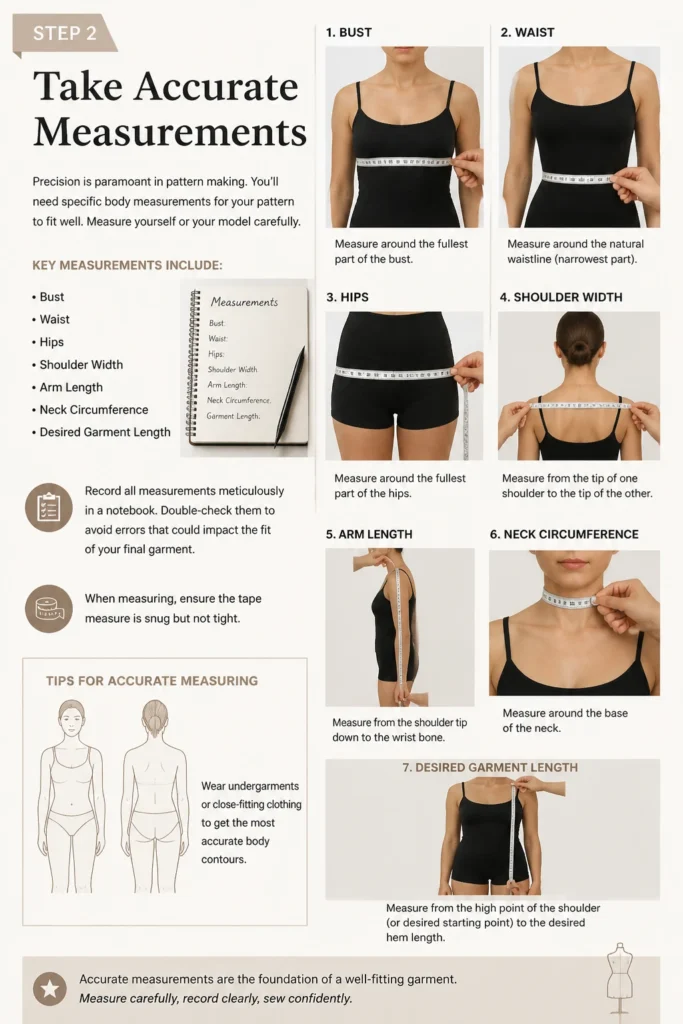
Measure yourself or your model carefully. Key measurements include bust, waist, hips, shoulder width, arm length, neck circumference, and desired garment length.
Record all measurements meticulously in a notebook. Double-check them to avoid errors that could impact the fit of your final garment.
When measuring, ensure the tape measure is snug but not tight. Wear undergarments or close-fitting clothing to get the most accurate body contours.
Step 3: Draft Your Basic Block (Sloper)
A basic block, or sloper, is a fitted, pattern foundation without seam allowances or design details. It’s your starting point for nearly any garment.
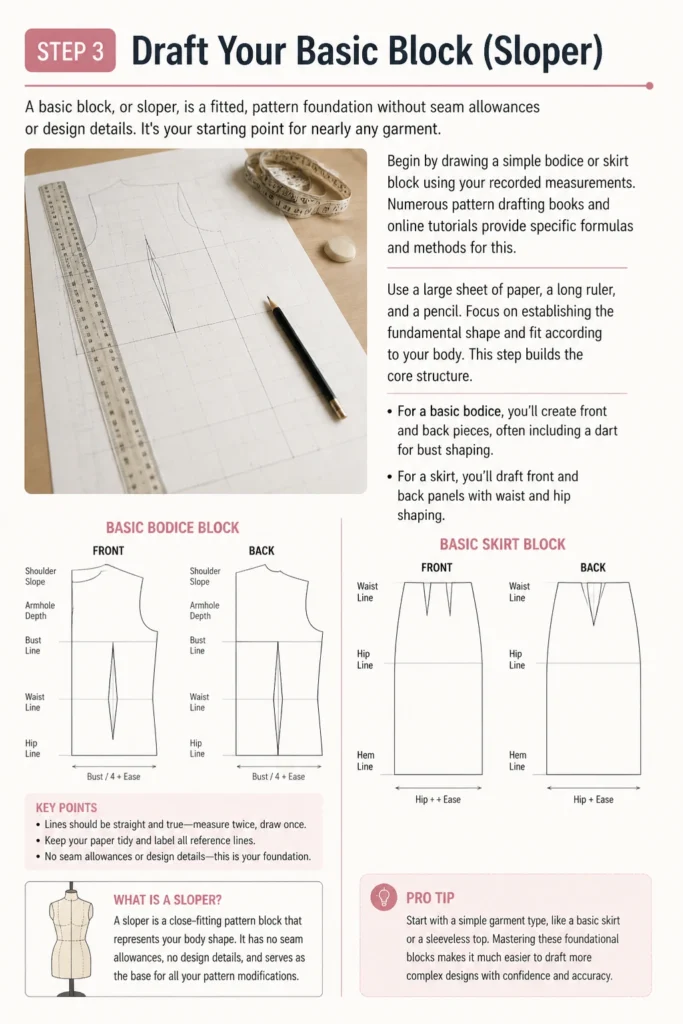
Begin by drawing a simple bodice or skirt block using your recorded measurements. Numerous pattern drafting books and online tutorials provide specific formulas and methods for this.
Use a large sheet of paper, a long ruler, and a pencil. Focus on establishing the fundamental shape and fit according to your body. This step builds the core structure.
For a basic bodice, you’ll create front and back pieces, often including a dart for bust shaping. For a skirt, you’ll draft front and back panels with waist and hip shaping.
Pro Tip: Start with a simple garment type, like a basic skirt or a sleeveless top. Mastering these foundational blocks makes more complex designs easier to tackle later.
Step 4: Refine and Add Design Details
Now, transform your basic block into your unique design. This is where your creativity truly shines.
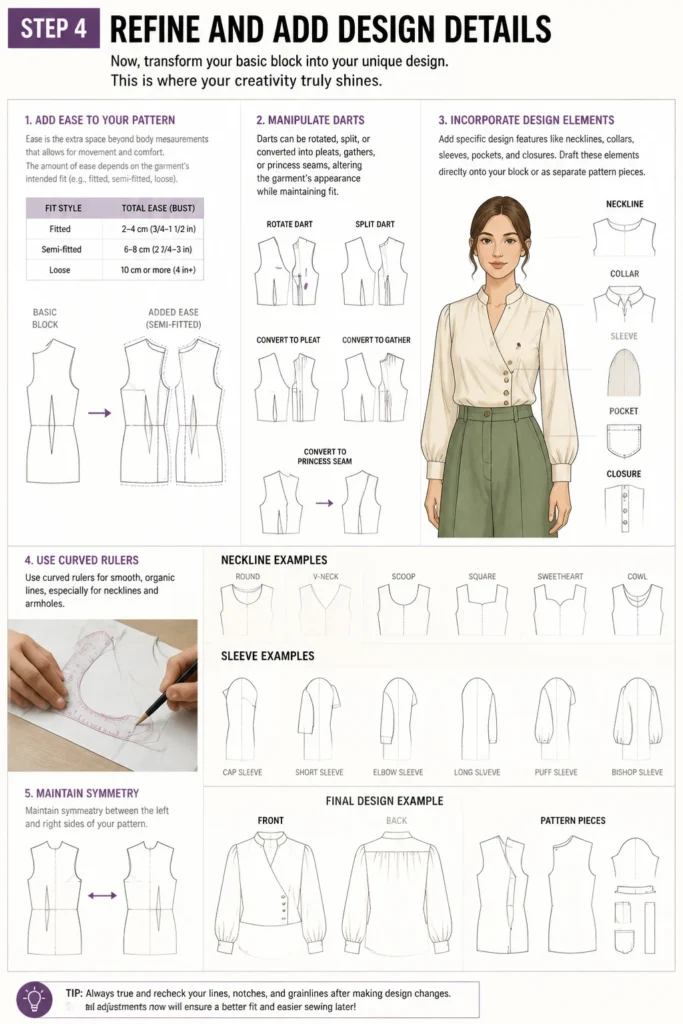
Add ease to your pattern. Ease is the extra space beyond body measurements that allows for movement and comfort. The amount of ease depends on the garment’s intended fit (e.g., fitted, semi-fitted, loose).
Manipulate darts to create style lines. Darts can be rotated, split, or converted into pleats, gathers, or princess seams, altering the garment’s appearance while maintaining fit.
Incorporate specific design elements like necklines, collars, sleeves, pockets, and closures. Draft these elements directly onto your block or as separate pattern pieces.
Use curved rulers for smooth, organic lines, especially for necklines and armholes. Maintain symmetry between the left and right sides of your pattern pieces where appropriate.
Step 5: Add Seam Allowances and Hems
Once your design is fully drafted, you need to add seam allowances and hem allowances to all edges.
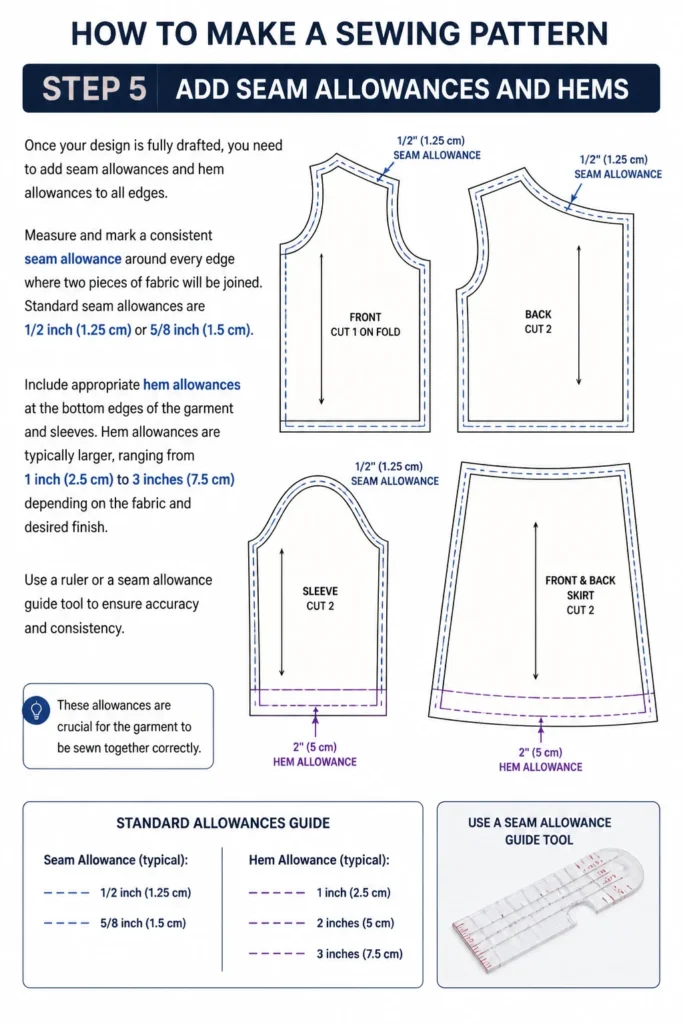
Measure and mark a consistent seam allowance around every edge where two pieces of fabric will be joined. Standard seam allowances are 1/2 inch (1.25 cm) or 5/8 inch (1.5 cm).
Include appropriate hem allowances at the bottom edges of the garment and sleeves. Hem allowances are typically larger, ranging from 1 inch (2.5 cm) to 3 inches (7.5 cm) depending on the fabric and desired finish.
Use a ruler or a seam allowance guide tool to ensure accuracy and consistency. These allowances are crucial for the garment to be sewn together correctly.
Step 6: Mark Pattern Details and Information
Properly marking your pattern pieces is essential for accurate cutting and sewing.
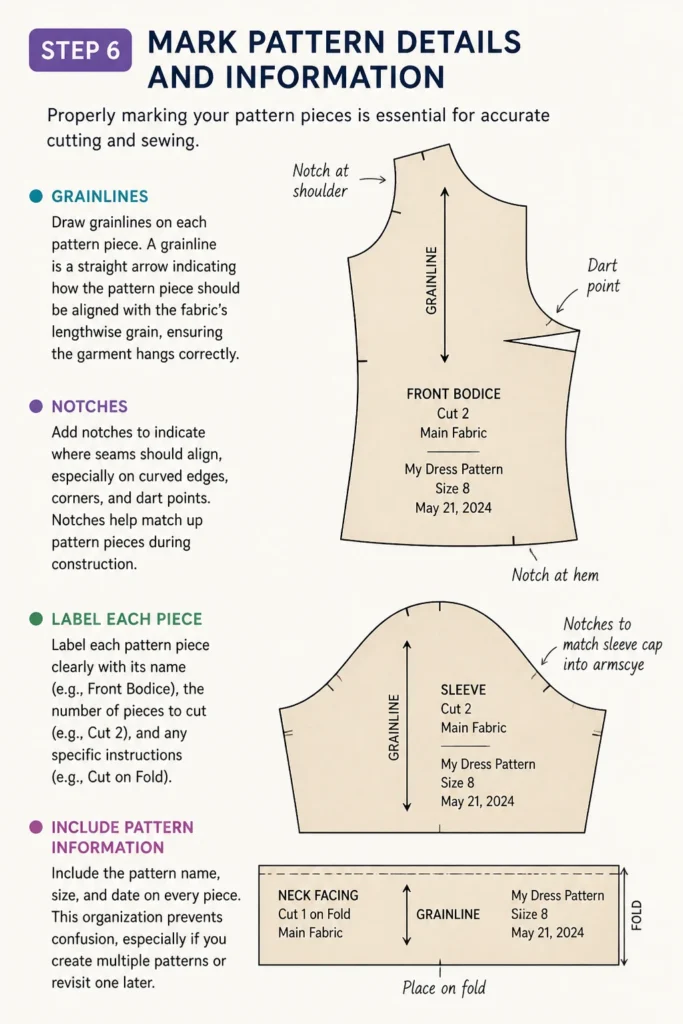
Draw grainlines on each pattern piece. A grainline is a straight arrow indicating how the pattern piece should be aligned with the fabric’s lengthwise grain, ensuring the garment hangs correctly.
Add notches to indicate where seams should align, especially on curved edges, corners, and dart points. Notches help match up pattern pieces during construction.
Label each pattern piece clearly with its name (e.g., “Front Bodice,” “Sleeve”), the number of pieces to cut (e.g., “Cut 2”), and any specific instructions (e.g., “Cut on Fold”).
Include the pattern name, size, and date on every piece. This organization prevents confusion, especially if you create multiple patterns or revisit one later.
Step 7: Create and Fit a Muslin
A muslin, or toile, is a test garment made from inexpensive fabric. It’s a critical step for checking fit and making adjustments before cutting into your final fabric.
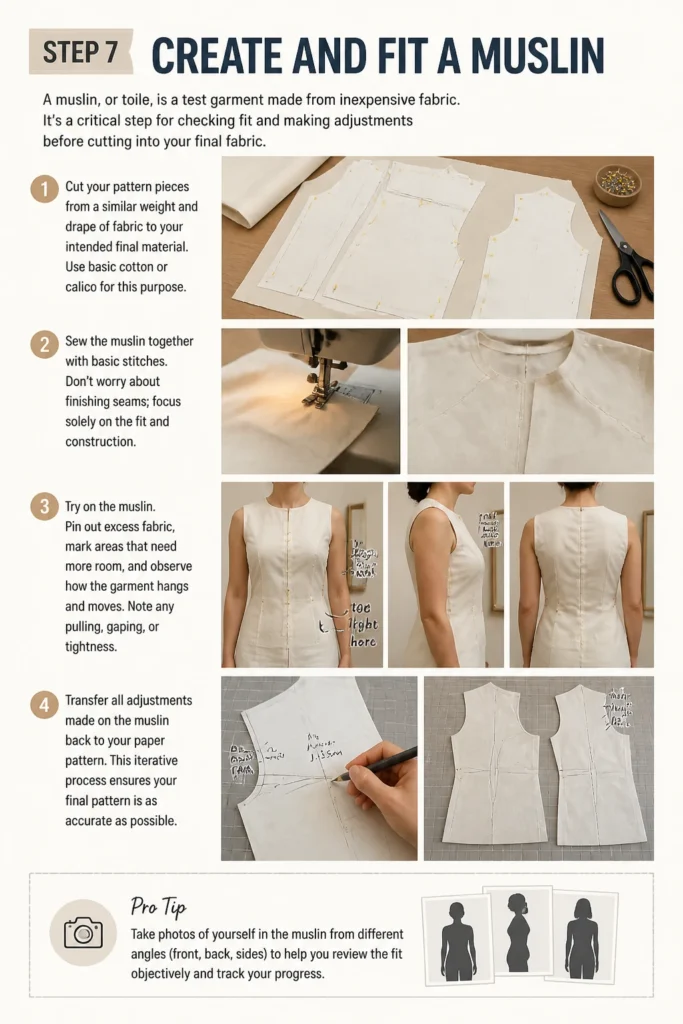
Cut your pattern pieces from a similar weight and drape of fabric to your intended final material. Use basic cotton or calico for this purpose.
Sew the muslin together with basic stitches. Don’t worry about finishing seams; focus solely on the fit and construction.
Try on the muslin. Pin out excess fabric, mark areas that need more room, and observe how the garment hangs and moves. Note any pulling, gaping, or tightness.
Transfer all adjustments made on the muslin back to your paper pattern. This iterative process ensures your final pattern is as accurate as possible.
Pro Tip: Take photos of yourself in the muslin from different angles. This provides an objective view of the fit and helps you spot areas for improvement you might miss in a mirror.
Step 8: Finalize and Digitize Your Pattern
After perfecting your pattern through muslin fittings, it’s time to create the final, durable version.
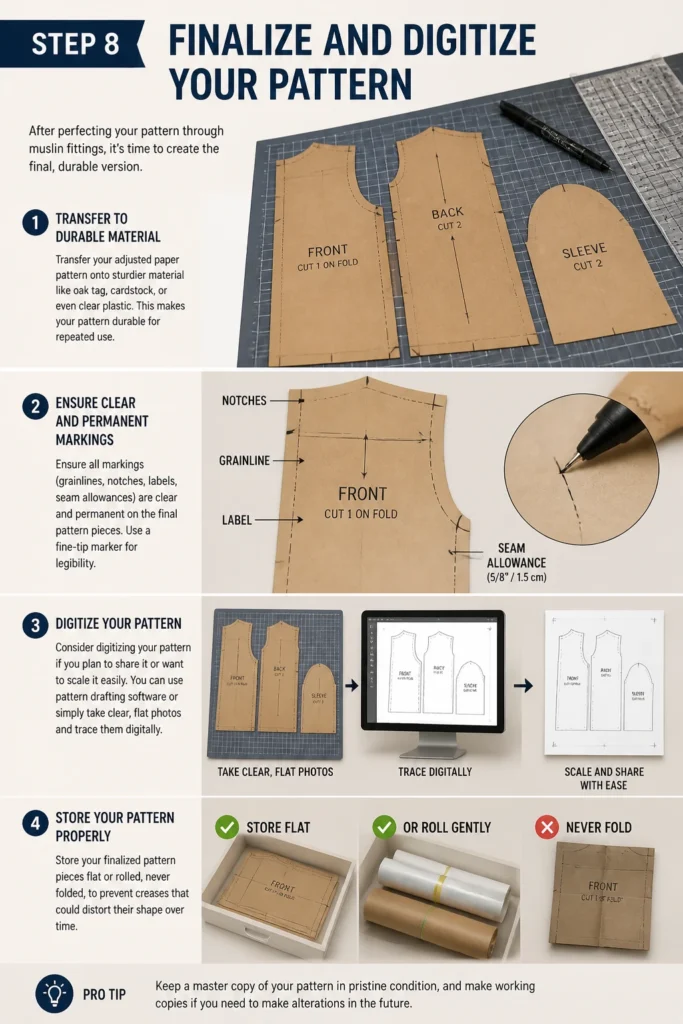
Transfer your adjusted paper pattern onto sturdier material like oak tag, cardstock, or even clear plastic. This makes your pattern durable for repeated use.
Ensure all markings (grainlines, notches, labels, seam allowances) are clear and permanent on the final pattern pieces. Use a fine-tip marker for legibility.
Consider digitizing your pattern if you plan to share it or want to scale it easily. You can use pattern drafting software or simply take clear, flat photos and trace them digitally.
Store your finalized pattern pieces flat or rolled, never folded, to prevent creases that could distort their shape over time.
Common Mistakes to Avoid
Ignoring Ease
Many beginners draft patterns to exact body measurements, forgetting that garments need room to move. This results in clothing that is too tight and uncomfortable. Always build in appropriate ease for comfort and the garment’s intended style.
Skipping the Muslin
It’s tempting to jump straight to your beautiful fashion fabric, but skipping the muslin is a costly mistake. A muslin allows you to identify and correct fit issues, design flaws, and construction challenges before you cut into expensive material, saving you time and money.
Inconsistent Seam Allowances
If your seam allowances vary from one edge to another, your garment pieces won’t align correctly, leading to puckering, uneven seams, and a poor fit. Use a ruler or a consistent guide to mark all seam allowances precisely.
Poorly Labeled Pattern Pieces
A pattern with missing grainlines, unnotched curves, or unlabeled pieces is a recipe for confusion. Take the time to clearly mark every piece with all necessary information to ensure smooth cutting and assembly.
Troubleshooting
Garment Feels Too Tight or Restrictive
This usually indicates insufficient ease in your pattern. Examine your muslin to pinpoint areas of tightness. Slash and spread the pattern in those areas to add more room, then blend the lines smoothly. Remember to add ease for movement and comfort.
Fabric Pulls or Gapes in Certain Areas
Pulling or gaping often points to an issue with dart placement or insufficient shaping. For gaping necklines, you might need to add a dart or deepen an existing one. For pulling across the back, check your shoulder width and back length measurements against your block.
Sleeves Don’t Fit Armholes Smoothly
Sleeve fitting can be tricky. If your sleeve cap is too tall, it will pucker; if it’s too flat, it will restrict movement. Compare the armhole circumference of your bodice to the sleeve cap circumference. Adjust the sleeve cap height and width until it matches the armhole with appropriate ease for setting.
Key Takeaways
- Always start with a clear design concept and detailed sketches.
- Accurate body measurements are the foundation of a well-fitting pattern.
- Building a basic block is crucial for consistent and customizable patterns.
- Adding ease is vital for comfort and the intended silhouette of the garment.
- The muslin fitting process is non-negotiable for refining fit and design.
- Thoroughly mark and label all pattern pieces for clarity and ease of use.
Frequently Asked Questions
What kind of paper is best for pattern making?
Large rolls of pattern paper, dot and cross paper, or even butcher paper work well. For final, durable patterns, use oak tag or cardstock. The key is a surface large enough to accommodate your pieces and sturdy enough for repeated tracing.
How do I know how much ease to add?
The amount of ease depends on the garment’s style and fabric. For fitted garments, add minimal ease (1-2 inches). For semi-fitted, add moderate ease (2-4 inches). For loose garments, add generous ease (4+ inches). Always test your chosen ease with a muslin.
Can I draft patterns without a dress form?
Yes, absolutely. While a dress form can be helpful for visualizing and pinning, you can draft patterns directly from your body measurements. The muslin fitting stage becomes even more critical when working without a form, allowing you to fine-tune the fit on your actual body.
How do I grade a pattern to different sizes?
Pattern grading involves systematically increasing or decreasing the dimensions of a pattern to create different sizes. This is a more advanced skill, often done using specific grading rules and tools. Many pattern drafting software programs include grading functions.
Our Top Recommended Finds
- Large Roll of Pattern Paper: Essential for drafting full-size pieces, it allows for seamless creation without taping multiple sheets together.
- French Curve and Hip Curve Rulers: These specialized rulers help you draw smooth, natural-looking curves for necklines, armholes, and side seams.
- Pattern Notcher: A small, handheld tool that creates precise notches on your pattern edges, ensuring accuracy when matching pieces.
Unlock Your Creative Potential
Making your own sewing patterns is a journey of skill, precision, and immense personal satisfaction. Each pattern you create brings you closer to a wardrobe that truly reflects your unique style and fits you perfectly.
Don’t be afraid to experiment, make mistakes, and learn from every step. The most rewarding garments are often born from a willingness to try something new.
Grab your measuring tape and paper today, and start drafting that dream garment you’ve always envisioned.