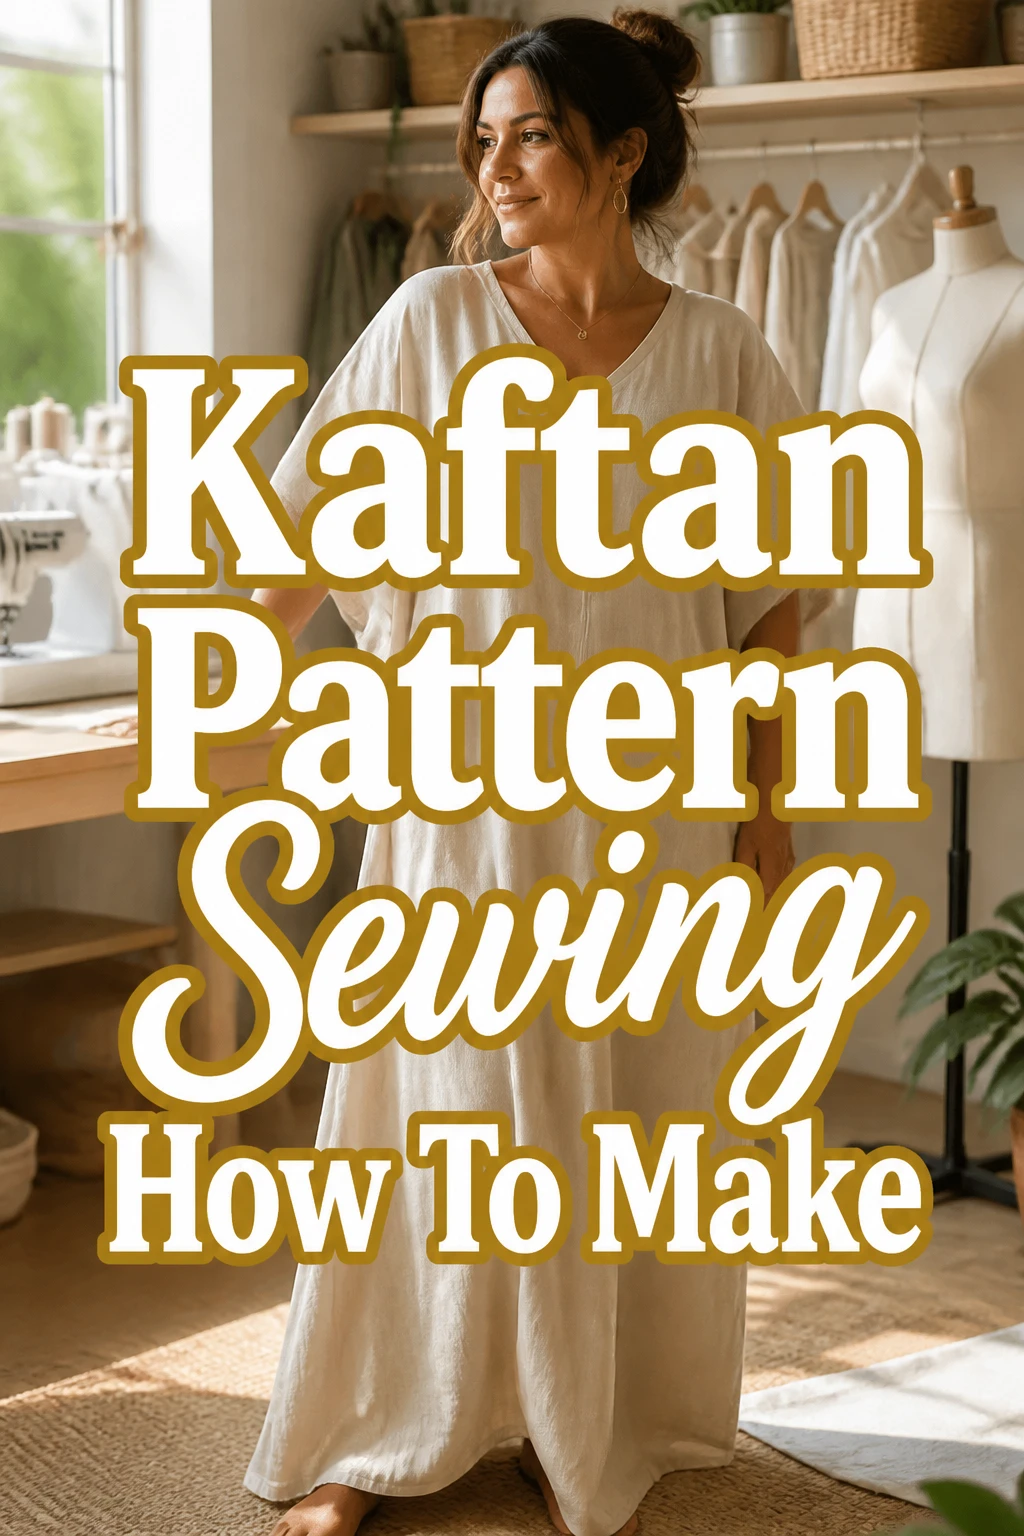
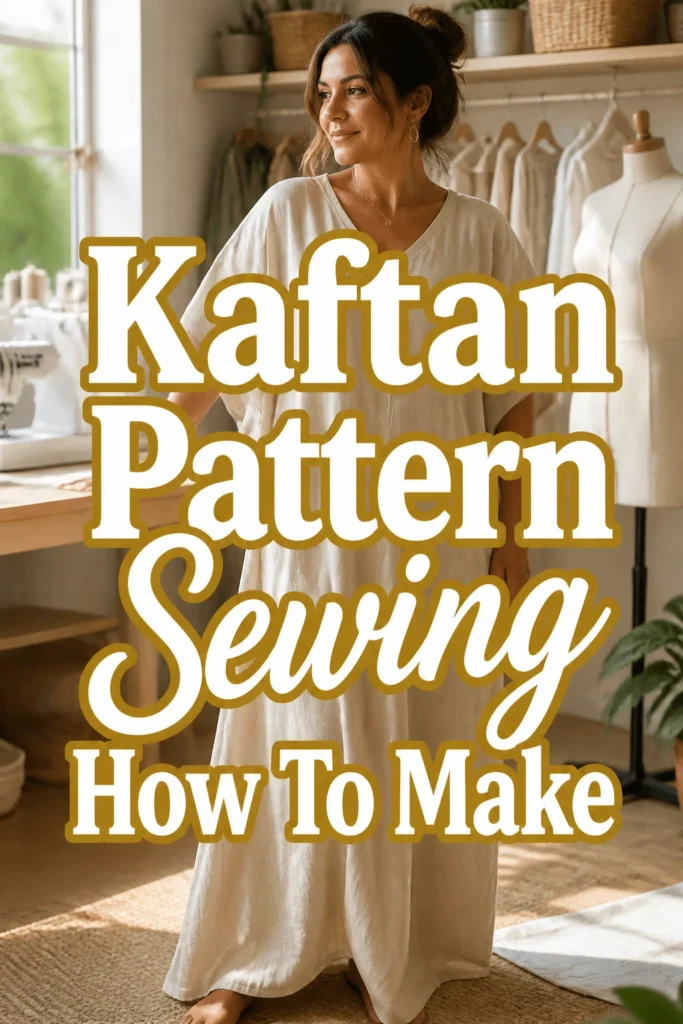
Kaftan Pattern Sewing How To Make
Dreaming of a comfortable, stylish kaftan that fits you perfectly?
Creating your own kaftan is a rewarding project, surprisingly straightforward for even new sewers.
I’ve sewn many kaftans over the years, discovering simple techniques that lead to beautiful results, and I’m excited to share them with you.
Quick Overview
This guide will walk you through crafting a custom kaftan from scratch. You’ll learn how to measure, cut, and sew a flowing garment tailored to your preferences, ready to wear for any occasion.
- Time needed: 4-6 hours (depending on experience)
- Difficulty: Beginner-Friendly Intermediate
- What you’ll need: Fabric, sewing machine, thread, scissors, measuring tape, pins, iron, chalk or fabric marker.
Step-by-Step Instructions
Step 1: Choose Your Fabric and Gather Supplies
Select a beautiful fabric for your kaftan. Light to medium-weight fabrics with a good drape work best. Think rayon, linen blends, cotton lawn, silk, or even a soft challis.
Consider the fabric width. Wider fabrics (54-60 inches) are often ideal as they may allow you to cut the kaftan from a single width, reducing side seams. Purchase enough fabric based on your desired length plus extra for hems and potential pattern matching.
Gather all your tools before starting. This includes your sewing machine, matching thread, sharp fabric scissors, a long measuring tape, fabric pins, an iron and ironing board, and a fabric marker or tailor’s chalk.
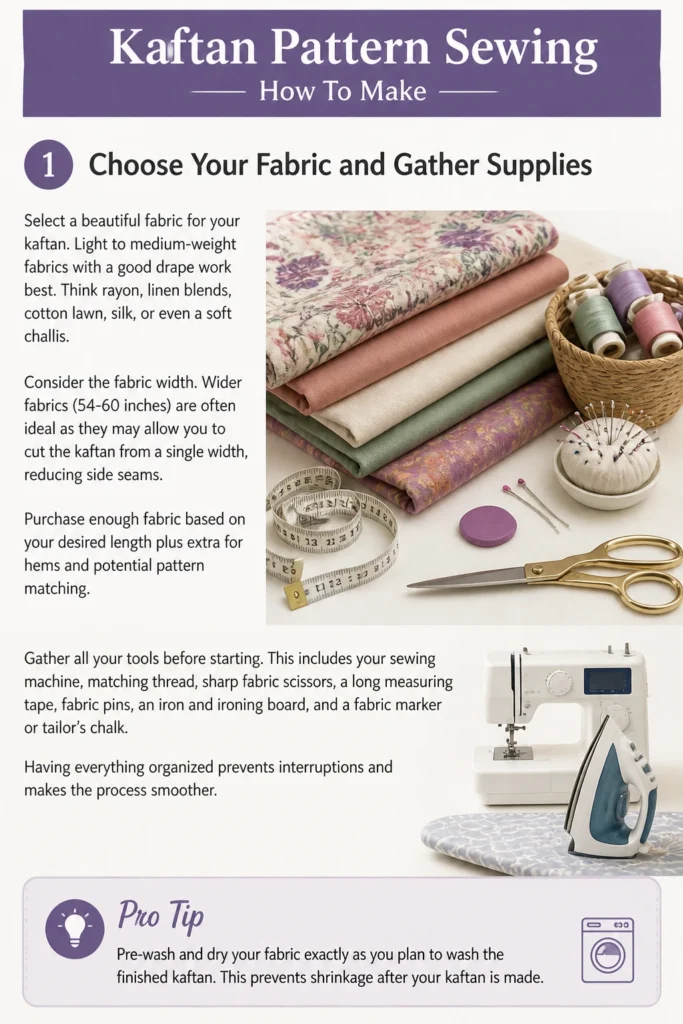
Having everything organized prevents interruptions and makes the process smoother.
Pro Tip: Pre-wash and dry your fabric exactly as you plan to wash the finished garment. This prevents shrinkage and color bleeding after your kaftan is sewn. Iron it smooth before cutting for accuracy.
Step 2: Take Your Measurements
Measure your body to determine the kaftan’s dimensions. You’ll primarily need your desired length and an understanding of your widest point (bust or hips).
For length, measure from the top of your shoulder down to where you want the hem to fall. Add 3-4 inches for hem allowances at both the top (neckline facing) and bottom hem.
For width, decide how loose you want the kaftan to be. A good starting point is to measure around your widest part (bust or hips) and multiply that by 1.5 to 2 for a comfortable, flowing fit. Divide this by two for the width of each kaftan panel.
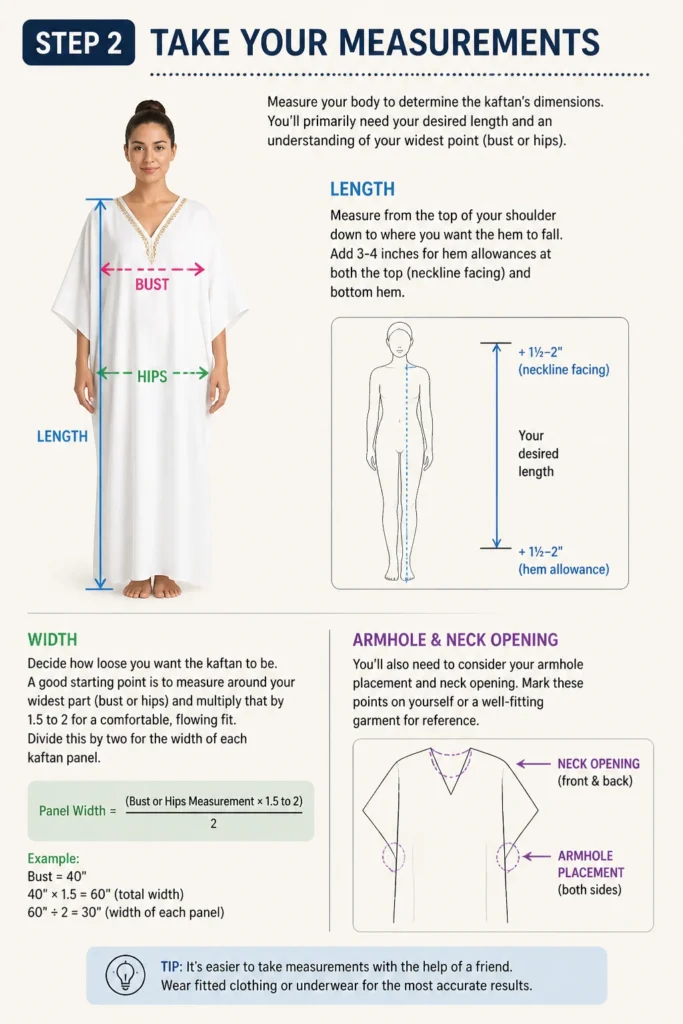
You’ll also need to consider your armhole placement and neck opening. Mark these points on yourself or a well-fitting garment for reference.
Step 3: Prepare and Cut Your Fabric
Lay your pre-washed and ironed fabric flat on a large surface. Fold it in half lengthwise, matching the selvage edges. Ensure it’s smooth and wrinkle-free.
Using your measurements, mark the dimensions directly onto the fabric with your fabric marker or chalk. For a basic kaftan, you’ll essentially be cutting two large rectangles or a single large piece folded in half.
Cut out your kaftan pieces carefully. If cutting two panels (front and back), ensure they are identical. If cutting one piece folded, cut the outer edges and the neckline opening. Remember to add seam allowances (typically 1/2 inch to 5/8 inch) to all edges except the fold.
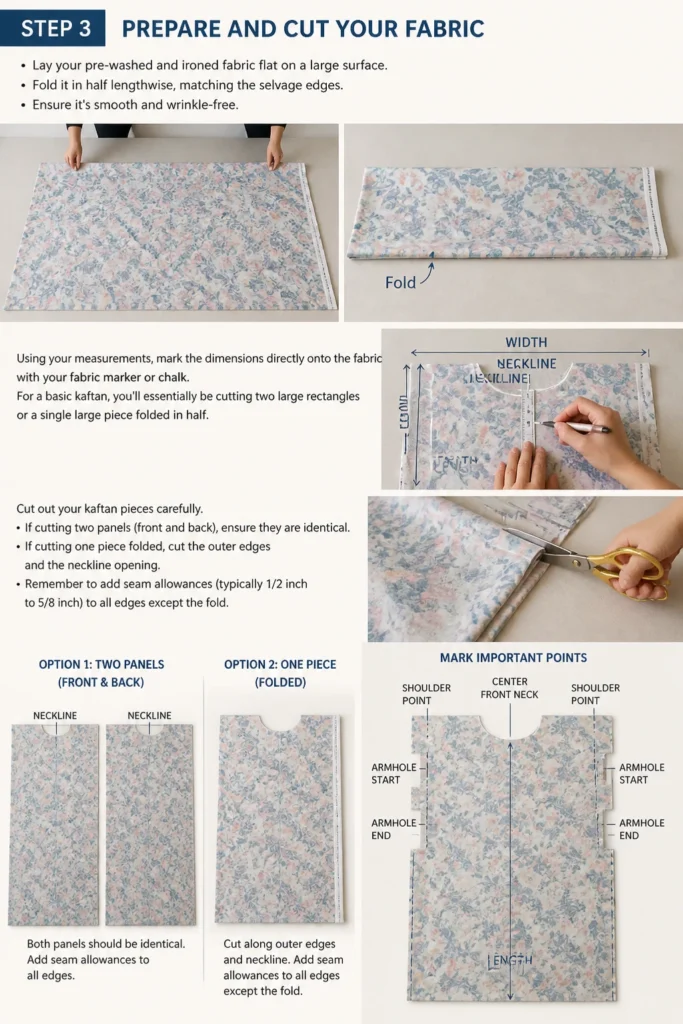
Mark the center front and back necklines, and the points where your armholes will begin and end. This precision in cutting is crucial for a well-fitting garment.
Pro Tip: For a simple kaftan, you can fold your fabric in half, then in half again crosswise. This creates a center point for the neck and allows you to cut the armholes symmetrically on the fold.
Step 4: Create the Neckline
Decide on your desired neckline shape. A simple boat neck, V-neck, or rounded scoop neck are common choices for kaftans. You can draw your chosen shape directly onto the fabric at the center front.
For a rounded or V-neck, you will typically cut a facing piece from scrap fabric that mirrors the neckline shape. This facing provides a clean finish and adds durability.
Sew the facing to the main kaftan body. Place the facing right sides together with the neckline edge, pin securely, and stitch along the neckline curve. Trim the seam allowance, clip curves, and understitch the facing to help it roll to the inside.
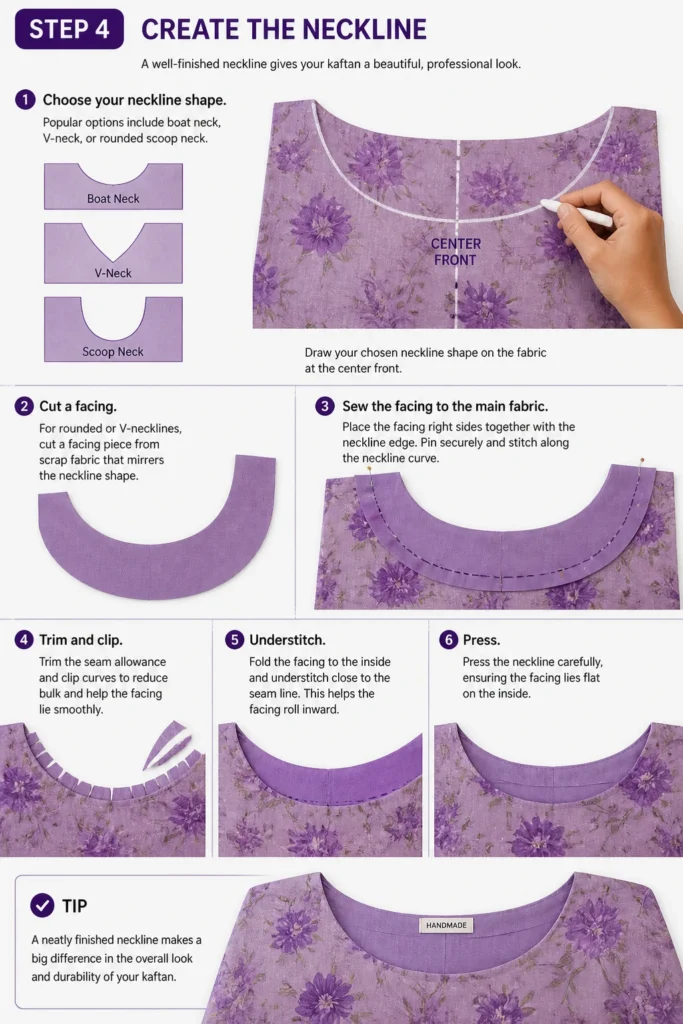
Press the neckline carefully, ensuring the facing lies flat on the inside. This step makes a significant difference in the garment’s overall appearance.
Step 5: Stitch the Side Seams
Place your front and back kaftan pieces right sides together, aligning the raw edges. Pin along the side seams, starting from your desired armhole opening down to the hem.
Make sure to leave an opening for the armholes. The length of this opening depends on your preference and the kaftan’s design. Typically, armholes range from 10 to 15 inches from the top shoulder edge.
Sew the side seams using your chosen seam allowance. Backstitch at the beginning and end of each seam to secure it. If your fabric frays easily, consider finishing these raw edges with a serger or a zigzag stitch.
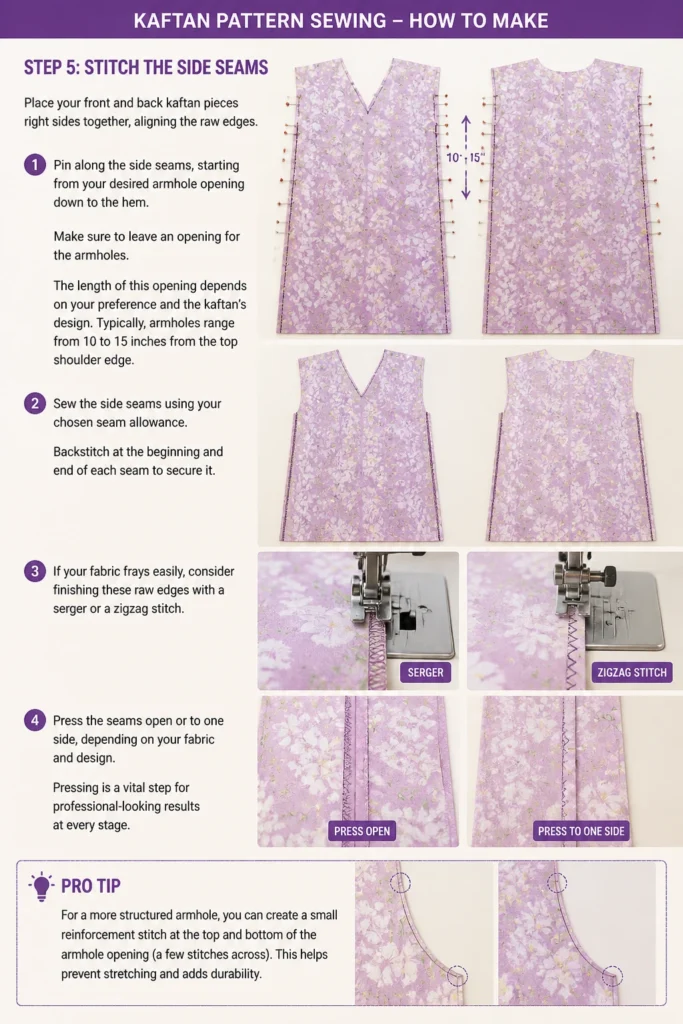
Press the seams open or to one side, depending on your fabric and design. Pressing is a vital step for professional-looking results at every stage.
Pro Tip: For a more structured armhole, you can create a small “sleeve” by stitching the side seam for a few inches, then leaving a gap for the armhole, and continuing the seam down to the hem. This creates a slight sleeve effect.
Step 6: Finish the Armholes
Prepare the armhole edges for a clean finish. There are several ways to do this, depending on your preference. A simple double-fold hem or a bias tape binding are popular choices.
For a double-fold hem, fold the raw edge of the armhole towards the inside by 1/4 inch and press. Fold it again by another 1/4 to 1/2 inch, press, and pin.
Stitch the hem in place close to the inner folded edge. Alternatively, you can use pre-made or self-made bias tape. Attach the bias tape around the armhole edge, fold it to the inside, and stitch it down for a very neat finish.
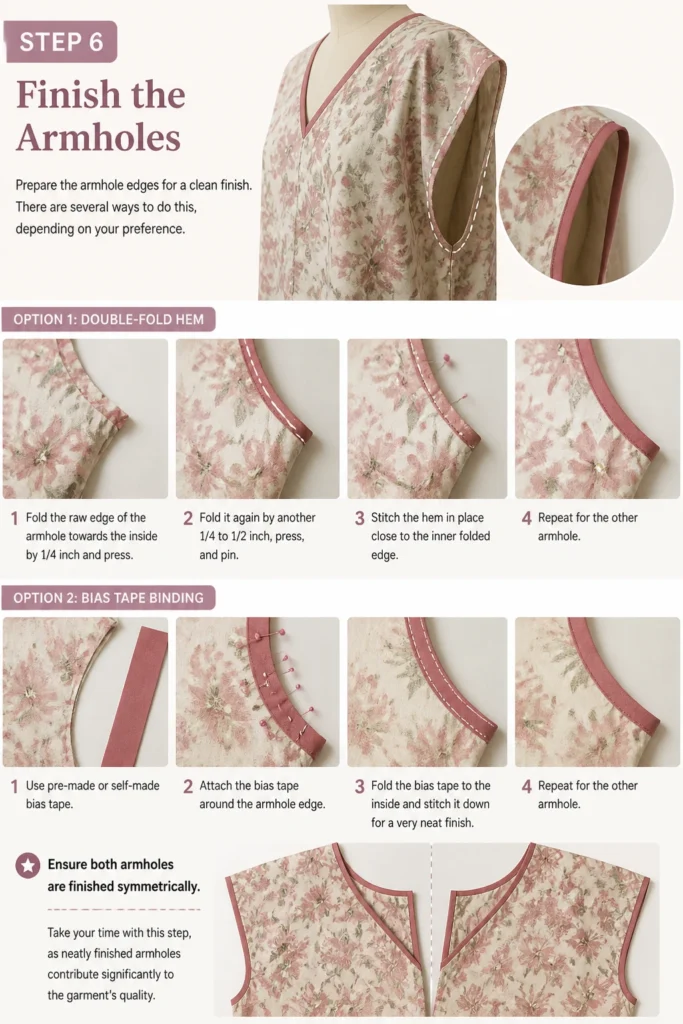
Ensure both armholes are finished symmetrically. Take your time with this step, as neatly finished armholes contribute significantly to the garment’s quality.
Step 7: Hem the Kaftan
Prepare the bottom edge of your kaftan for hemming. Try on the kaftan to confirm the desired length. Adjust if necessary, then trim any uneven edges.
For most kaftans, a simple double-fold hem works well. Fold the raw edge up by 1/2 inch and press firmly.
Fold it up again by another 1 to 1.5 inches, depending on your preference for hem depth. Press this second fold well and pin it securely all around the bottom edge.
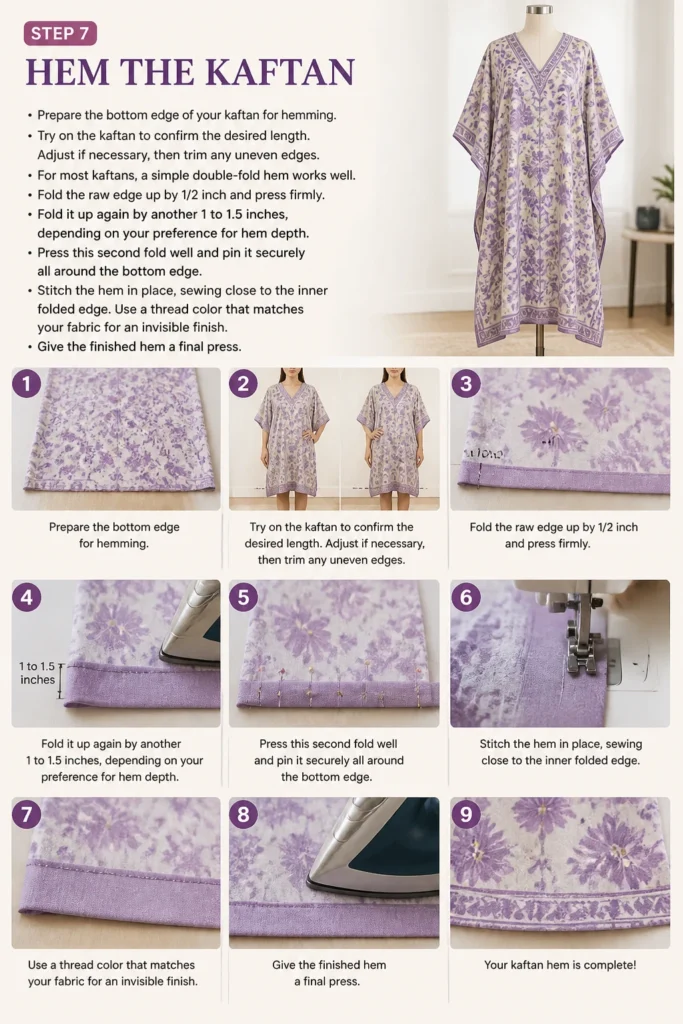
Stitch the hem in place, sewing close to the inner folded edge. Use a thread color that matches your fabric for an invisible finish. Give the finished hem a final press.
Step 8: Final Press and Inspection
Give your newly sewn kaftan a thorough final press. Iron out any remaining wrinkles and ensure all seams and hems lie flat and smooth.
This final pressing step often makes a garment look professionally made. It sets the stitches and smooths out any puckering.
Inspect your kaftan for any loose threads or missed stitches. Trim all thread tails for a clean finish. Check the seams, neckline, and armholes to ensure everything is secure and looks neat.
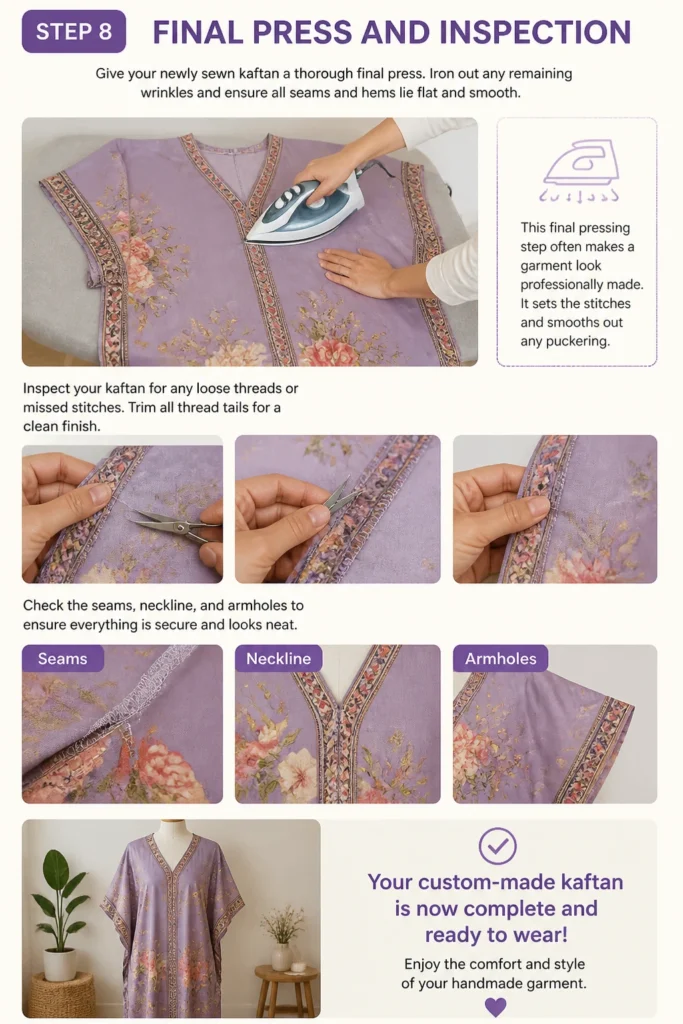
Your custom-made kaftan is now complete and ready to wear! Enjoy the comfort and style of your handmade garment.
Common Mistakes to Avoid
Skipping Pre-Washing Fabric
Many new sewers bypass pre-washing their fabric, eager to start cutting. This often leads to disappointment when the finished garment shrinks significantly after its first wash, distorting the fit or making it unwearable. Always pre-wash and dry your fabric to prevent future shrinkage issues and ensure colorfastness.
Inaccurate Measurements and Cutting
Guessing or rushing measurements can result in a kaftan that doesn’t fit well or is lopsided. Take your time to measure accurately and mark clearly. Cutting precisely, following your marked lines, is equally important for symmetrical and well-constructed garments. Use sharp scissors to avoid jagged edges.
Neglecting to Press Seams
Pressing seams open or to one side after each stitching step is crucial for a professional finish. Skipping pressing can lead to bulky seams, puckering, and a generally unpolished appearance. An iron is as important as your sewing machine for quality results.
Troubleshooting
Wavy or Stretched Neckline
A wavy or stretched neckline often happens with lightweight fabrics or when the fabric is pulled during stitching. To fix this, gently apply steam and press the neckline, easing the fabric back into shape. Next time, consider adding a strip of fusible interfacing to the neckline edge before sewing to stabilize it.
Uneven Hem
An uneven hem can be frustrating, especially on a flowing garment. This usually occurs if the fabric wasn’t cut evenly or if the hem was measured while the garment was lying flat without accounting for drape. To correct, try on the kaftan, have someone mark the desired hem length while you’re wearing it, and then re-cut and re-hem.
Puckering Seams
Puckering along seams can be caused by incorrect tension settings on your sewing machine, using the wrong needle for your fabric, or stretching the fabric as you sew. Check your machine’s tension, try a new needle (ballpoint for knits, universal for wovens), and use a walking foot if your fabric is particularly shifty. Gently pressing the seam can sometimes reduce puckering.
Key Takeaways
- Always pre-wash and iron your fabric for accurate cutting and to prevent future shrinkage.
- Accurate measuring and precise cutting are fundamental for a well-fitting kaftan.
- Pressing seams as you go is essential for a professional and smooth finish.
- Choose a fabric with good drape for the best kaftan silhouette.
- Take your time with the neckline and armhole finishes; they impact the garment’s overall look.
- Don’t be afraid to customize the length, width, and neckline to suit your personal style.
Frequently Asked Questions
What is the best fabric for a beginner to use for a kaftan?
For beginners, a stable cotton lawn or a linen blend is often easiest to work with. These fabrics are less slippery than silks and chiffons, making them easier to cut and sew accurately. They also press well, which helps with neat seam finishes.
How much fabric do I need for a kaftan?
The amount of fabric depends on your desired length and width, as well as the fabric’s width. A general rule of thumb is to take your desired kaftan length (from shoulder to hem) and multiply it by two, then add 10-12 inches for hems and adjustments. For wider kaftans or if your fabric is narrow, you might need more.
Can I make a kaftan without a sewing machine?
While possible with hand sewing, it will be much more time-consuming and challenging to achieve durable, neat seams. A sewing machine is highly recommended for efficiency and professional results. If hand sewing, use a strong backstitch for all seams.
How can I make my kaftan more unique?
Personalize your kaftan with various embellishments. Consider adding trim, embroidery, tassels to the hem or neckline, or even fabric paint. You can also experiment with different sleeve styles, such as adding a cuff or a wider “butterfly” sleeve, or creating a more intricate neckline design.
Our Top Recommended Finds
- Sharp Fabric Scissors: A good pair of dedicated fabric scissors (like Gingher or Kai) makes cutting smooth and accurate, crucial for a clean finish.
- Fabric Chalk or Disappearing Ink Pen: Essential for marking your cutting lines and measurements clearly on the fabric without permanent residue.
- Walking Foot for your Sewing Machine: If working with slippery or stretchy fabrics, a walking foot helps feed multiple layers of fabric evenly, preventing shifting and puckering.
Your Kaftan Journey Begins Now
You now possess the practical knowledge to create your very own kaftan. From selecting the perfect fabric to the final press, each step brings you closer to a unique, handmade garment.
Don’t let any hesitation hold you back. Gather your materials, set up your space, and begin your kaftan project today. You’ll be amazed at what you can achieve with a little patience and these clear instructions.