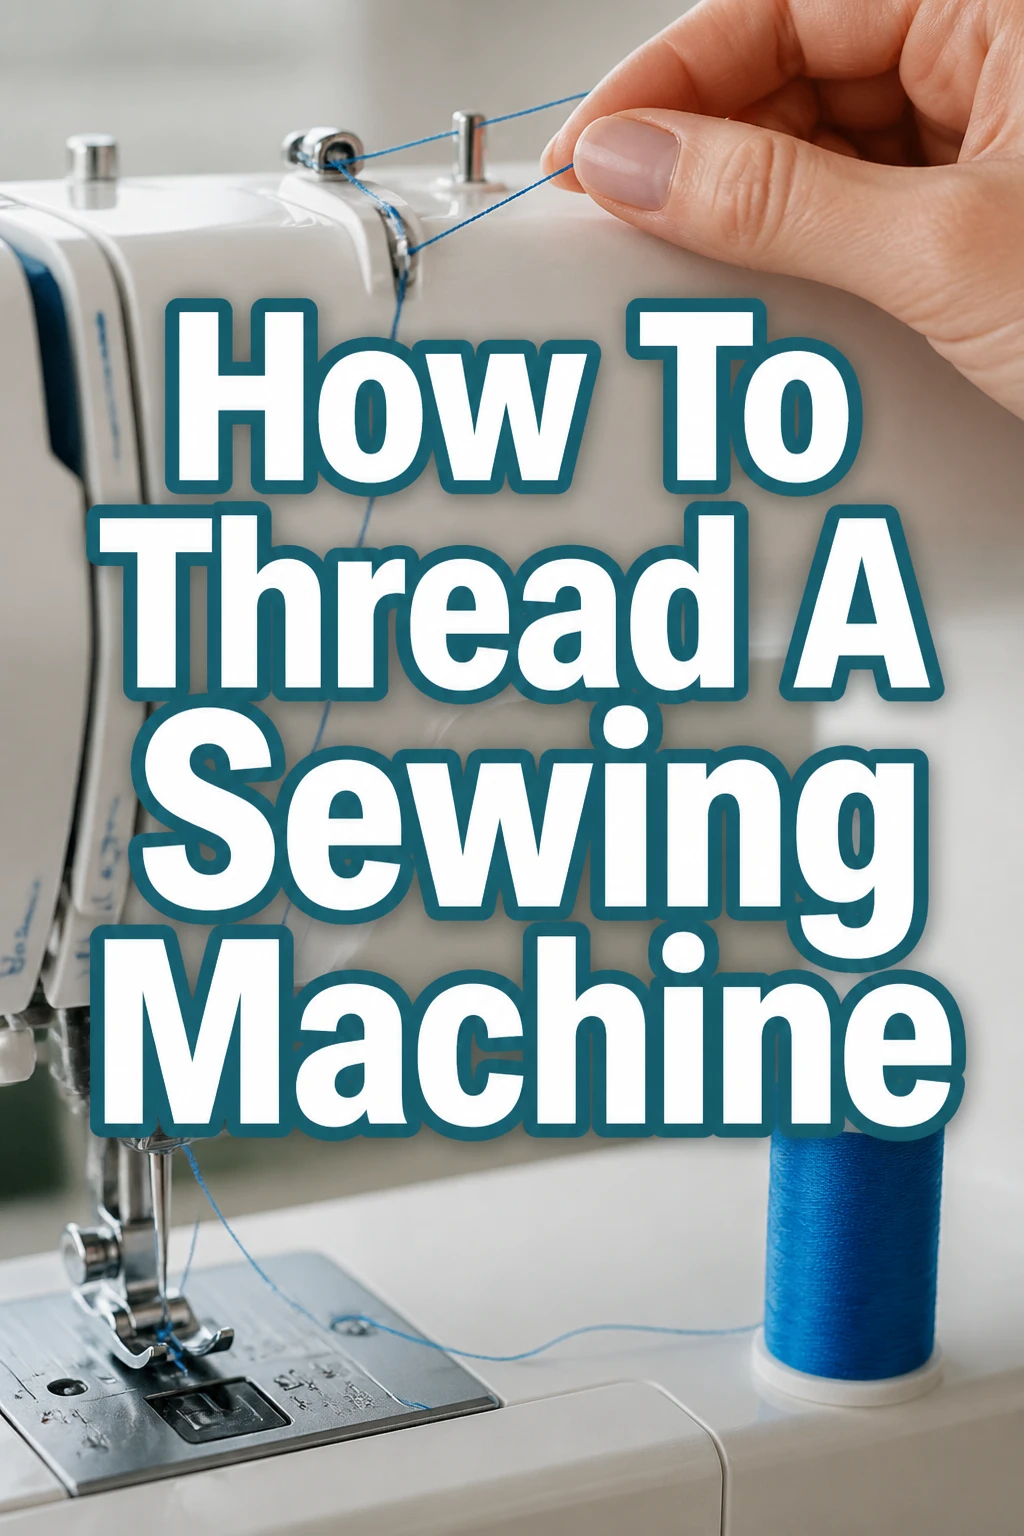
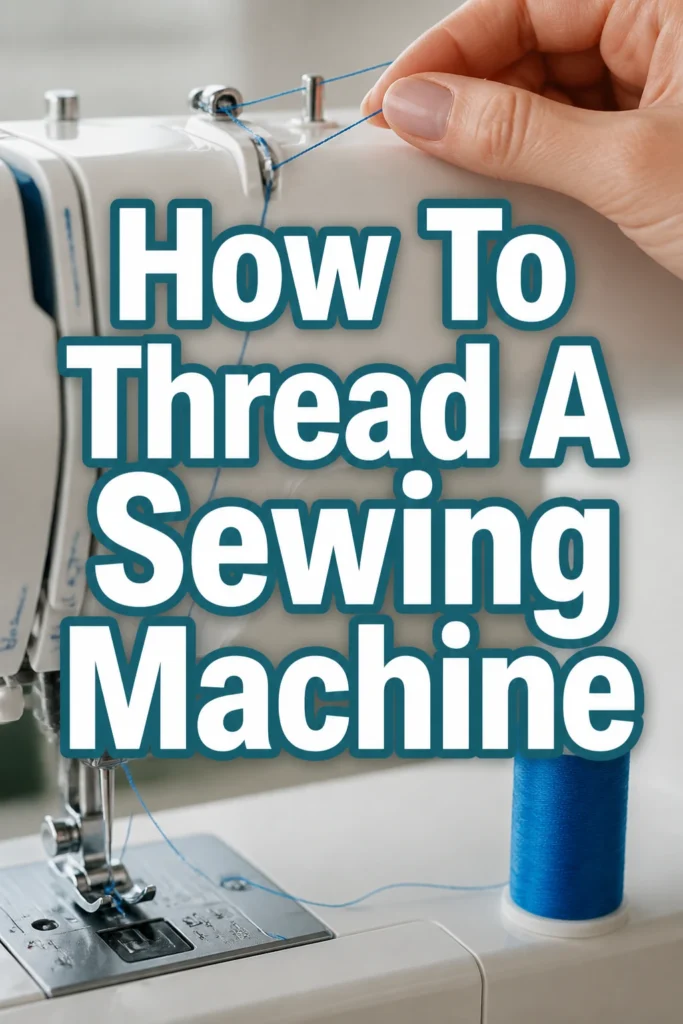
How To Thread A Sewing Machine
I remember sitting in front of my first sewing machine, a vintage metal beast, feeling completely intimidated by the maze of hooks and loops.
After years of teaching sewing workshops to beginners, I have realized that threading is the single biggest hurdle for most new crafters.
This guide simplifies the process into logical stages to help you gain confidence and get stitching quickly.
Quick Overview
Threading a sewing machine is a fundamental skill that connects the top spool of thread with the bottom bobbin thread to create a lockstitch.
- Time needed: 5 to 10 minutes
- Difficulty: Beginner
- What you’ll need: A sewing machine, a spool of all-purpose thread, a matching bobbin, and sharp scissors.
Step 1: Prepare Your Workspace
Turn off the power to your sewing machine before you begin any threading process.
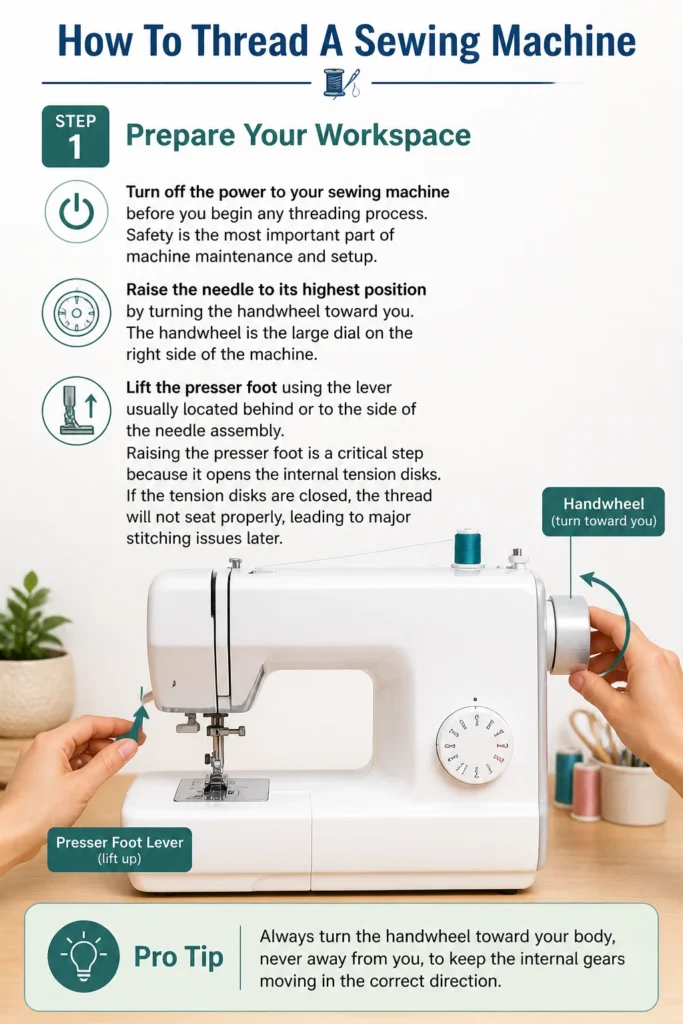
Safety is the most important part of machine maintenance and setup.
Raise the needle to its highest position by turning the handwheel toward you.
The handwheel is the large dial on the right side of the machine.
Lift the presser foot using the lever usually located behind or to the side of the needle assembly.
Raising the presser foot is a critical step because it opens the internal tension disks.
If the tension disks are closed, the thread will not seat properly, leading to major stitching issues later.
Pro Tip: Always turn the handwheel toward your body, never away from you, to keep the internal gears moving in the correct direction.
Step 2: Place the Spool on the Pin
Locate the spool pin on the top of your machine.
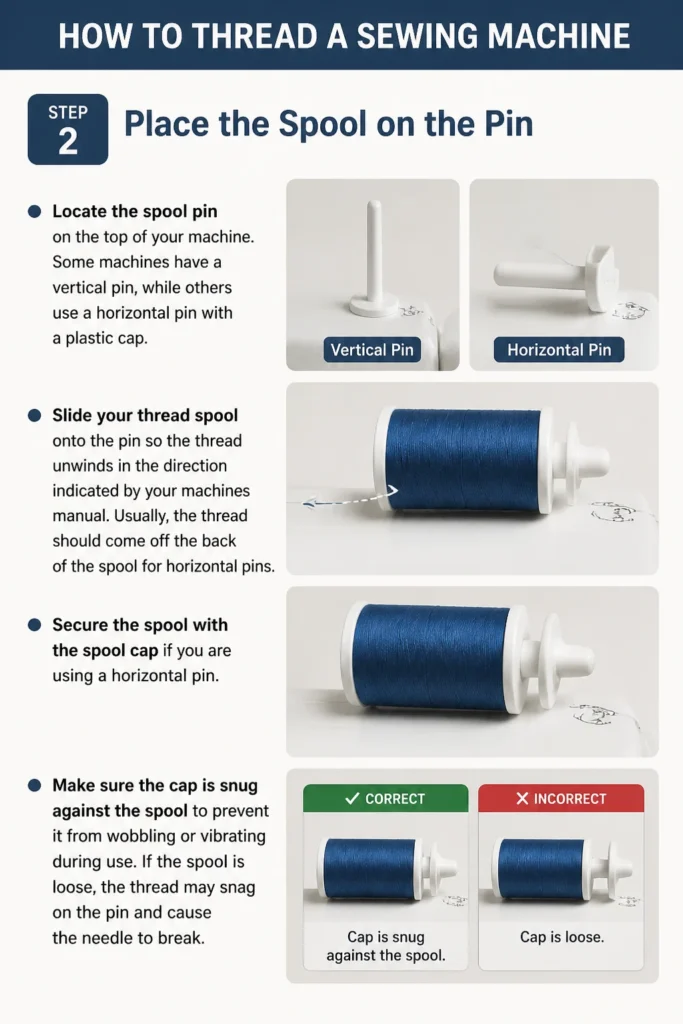
Some machines have a vertical pin, while others use a horizontal pin with a plastic cap.
Slide your thread spool onto the pin so the thread unwinds in the direction indicated by your machine’s manual.
Usually, the thread should come off the back of the spool for horizontal pins.
Secure the spool with the spool cap if you are using a horizontal pin.
Make sure the cap is snug against the spool to prevent it from wobbling or vibrating during use.
If the spool is loose, the thread may snag on the pin and cause the needle to break.
Step 3: Guide the Thread Through the Top Hooks
Pull a few inches of thread from the spool and locate the first thread guide.
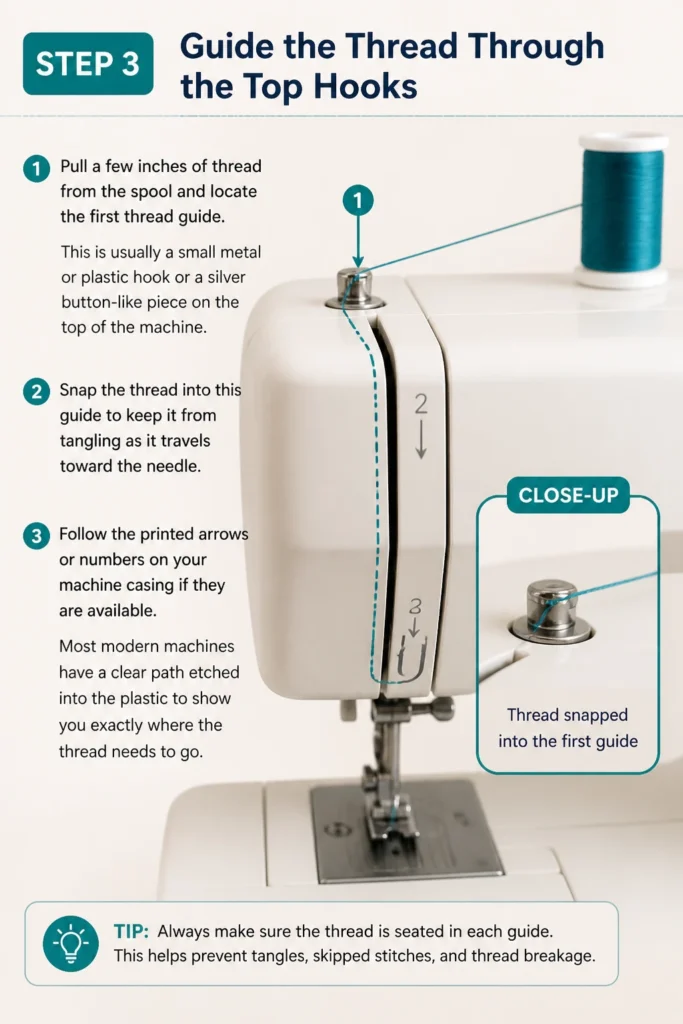
This is usually a small metal or plastic hook or a silver button-like piece on the top of the machine.
Snap the thread into this guide to keep it from tangling as it travels toward the needle.
Follow the printed arrows or numbers on your machine casing if they are available.
Most modern machines have a clear path etched into the plastic to show you exactly where the thread needs to go.
Step 4: Navigate the Tension Disks
Bring the thread down from the first guide and wrap it around the tension mechanism.
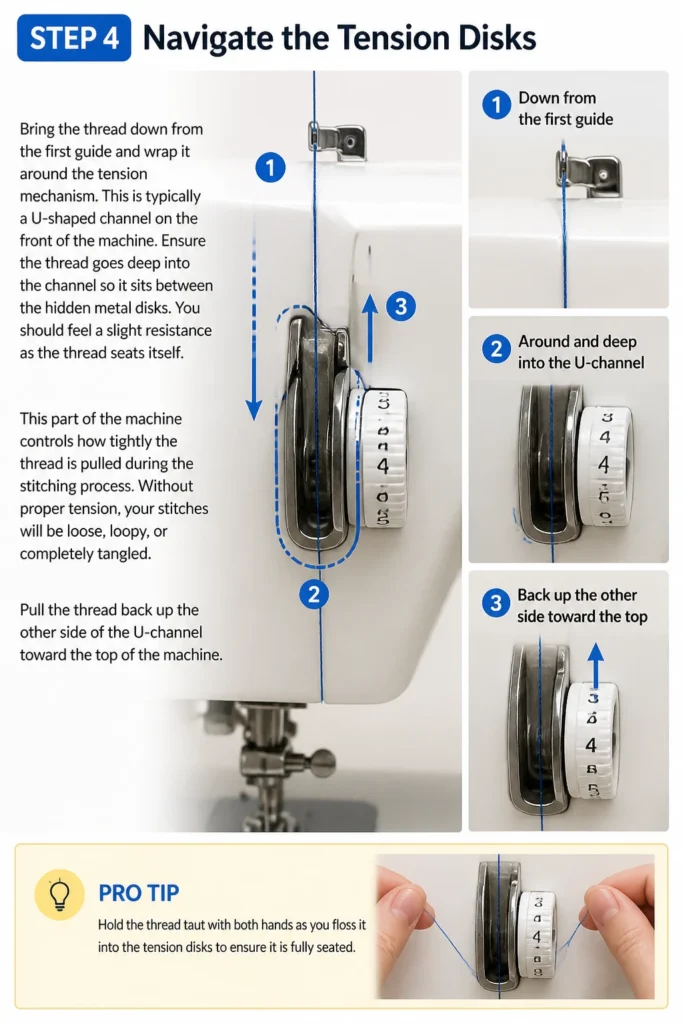
This is typically a U-shaped channel on the front of the machine.
Ensure the thread goes deep into the channel so it sits between the hidden metal disks.
You should feel a slight resistance as the thread seats itself.
This part of the machine controls how tightly the thread is pulled during the stitching process.
Without proper tension, your stitches will be loose, loopy, or completely tangled.
Pull the thread back up the other side of the U-channel toward the top of the machine.
Pro Tip: Hold the thread taut with both hands as you floss it into the tension disks to ensure it is fully seated.
Step 5: Loop Through the Take-Up Lever
Find the metal take-up lever, which should be at its highest point if you turned the handwheel earlier.
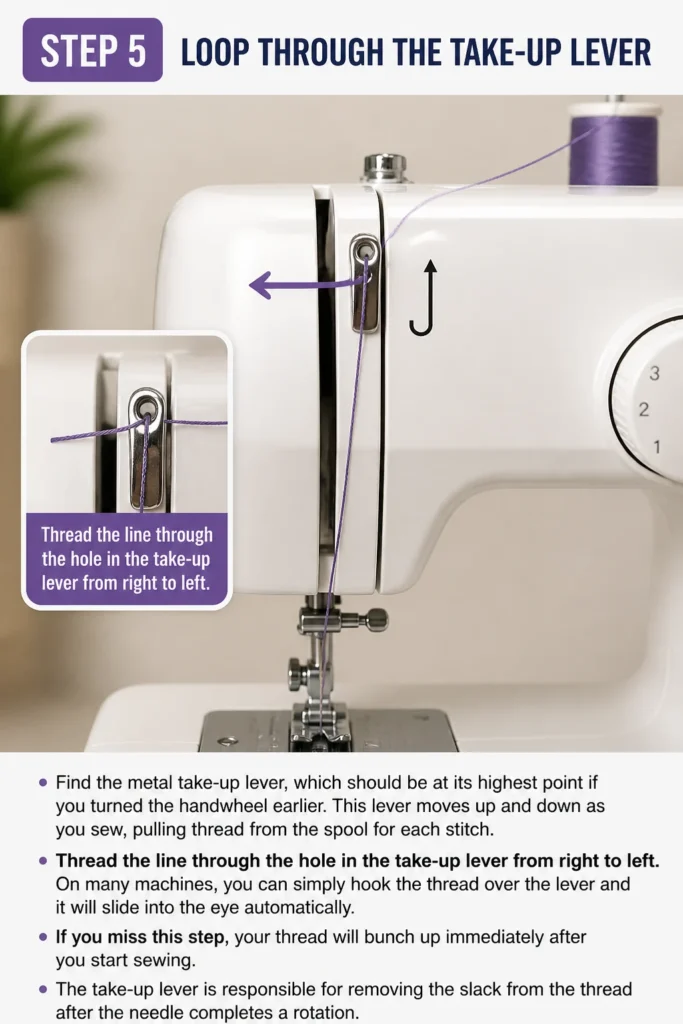
This lever moves up and down as you sew, pulling thread from the spool for each stitch.
Thread the line through the hole in the take-up lever from right to left.
On many machines, you can simply hook the thread over the lever and it will slide into the eye automatically.
If you miss this step, your thread will bunch up immediately after you start sewing.
The take-up lever is responsible for removing the slack from the thread after the needle completes a rotation.
Step 6: Use the Lower Thread Guides
Lead the thread back down toward the needle area.
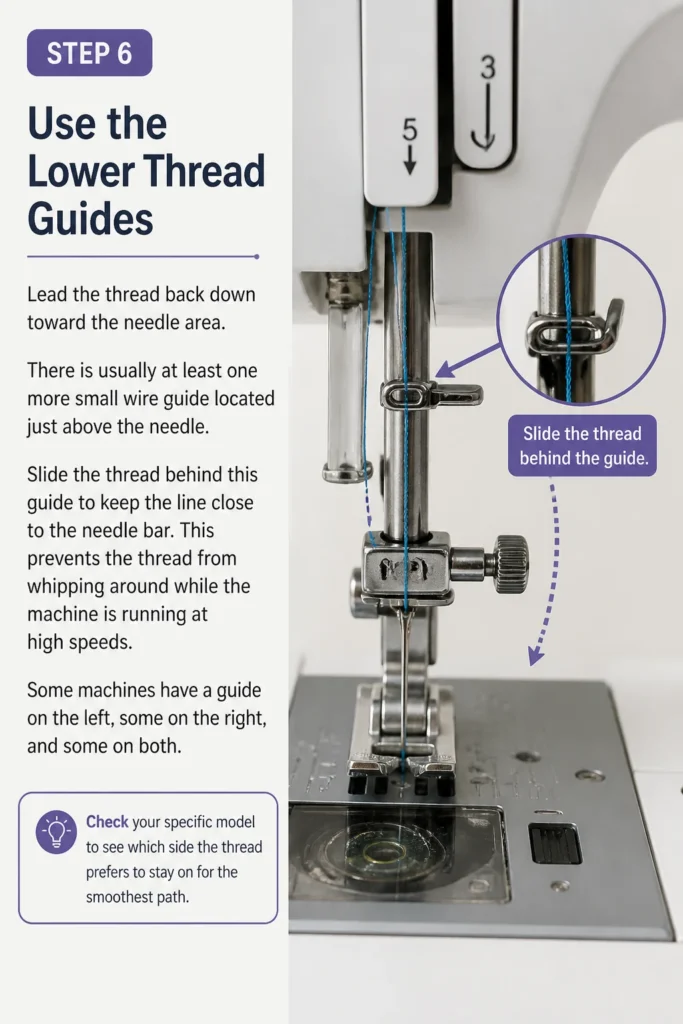
There is usually at least one more small wire guide located just above the needle.
Slide the thread behind this guide to keep the line close to the needle bar.
This prevents the thread from whipping around while the machine is running at high speeds.
Some machines have a guide on the left, some on the right, and some on both.
Check your specific model to see which side the thread prefers to stay on for the smoothest path.
Step 7: Thread the Needle
Trim the end of the thread with sharp scissors to create a clean, crisp edge.
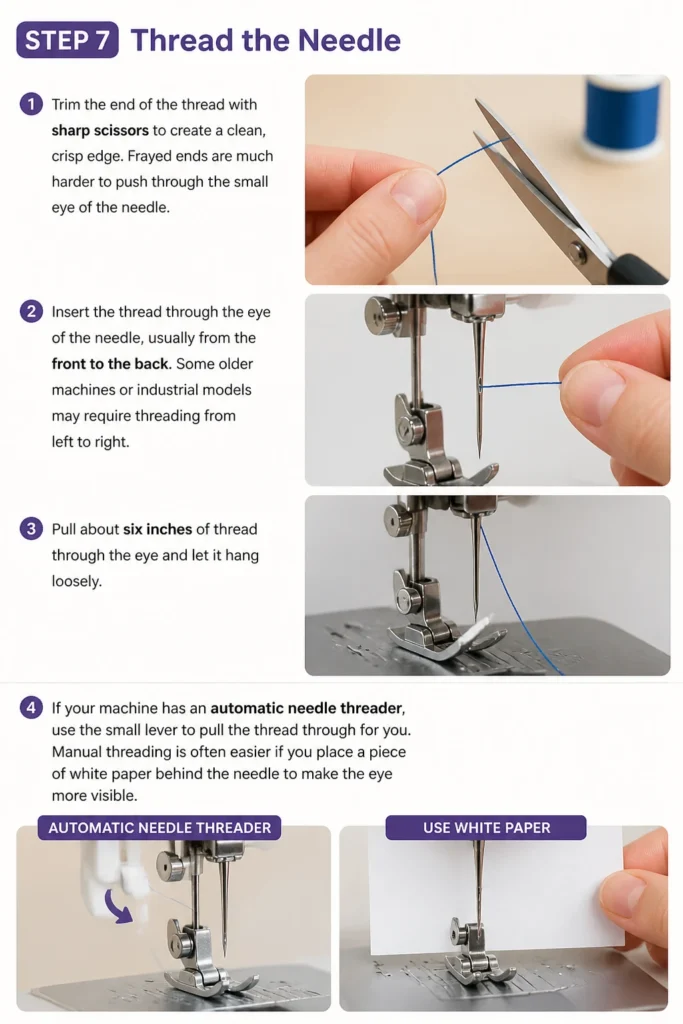
Frayed ends are much harder to push through the small eye of the needle.
Insert the thread through the eye of the needle, usually from the front to the back.
Some older machines or industrial models may require threading from left to right.
Pull about six inches of thread through the eye and let it hang loosely.
If your machine has an automatic needle threader, use the small lever to pull the thread through for you.
Manual threading is often easier if you place a piece of white paper behind the needle to make the eye more visible.
Step 8: Prepare and Insert the Bobbin
Open the bobbin cover, which is located under the needle plate.
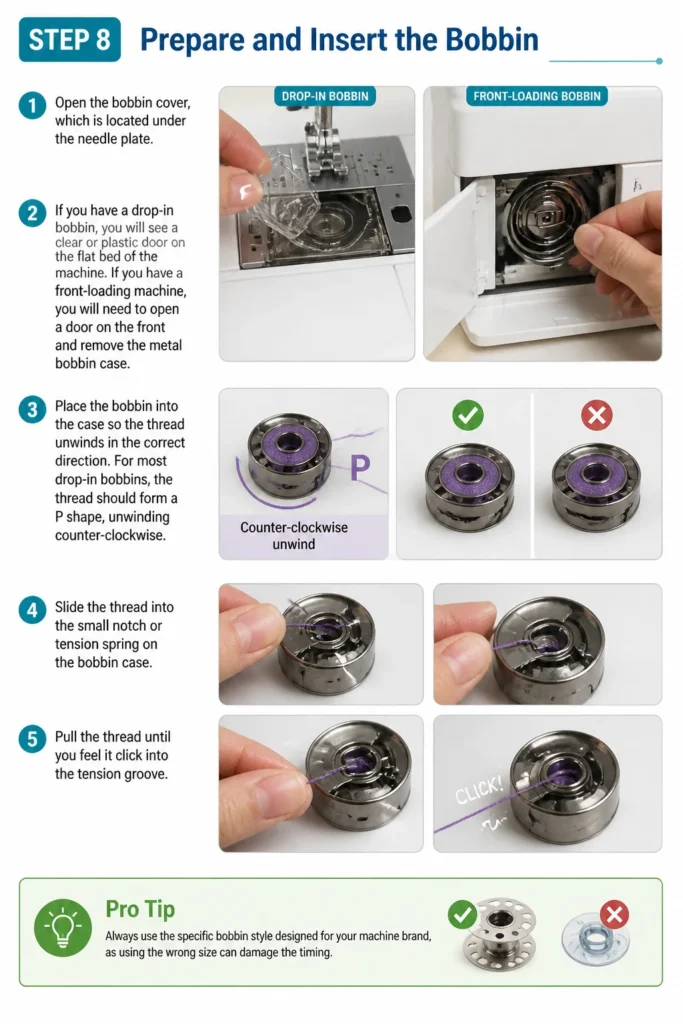
If you have a drop-in bobbin, you will see a clear or plastic door on the flat bed of the machine.
If you have a front-loading machine, you will need to open a door on the front and remove the metal bobbin case.
Place the bobbin into the case so the thread unwinds in the correct direction.
For most drop-in bobbins, the thread should form a “P” shape, unwinding counter-clockwise.
Slide the thread into the small notch or tension spring on the bobbin case.
Pull the thread until you feel it click into the tension groove.
Pro Tip: Always use the specific bobbin style designed for your machine brand, as using the wrong size can damage the timing.
Step 9: Bring Up the Bobbin Thread
Hold the tail of the top thread (the one through the needle) gently with your left hand.
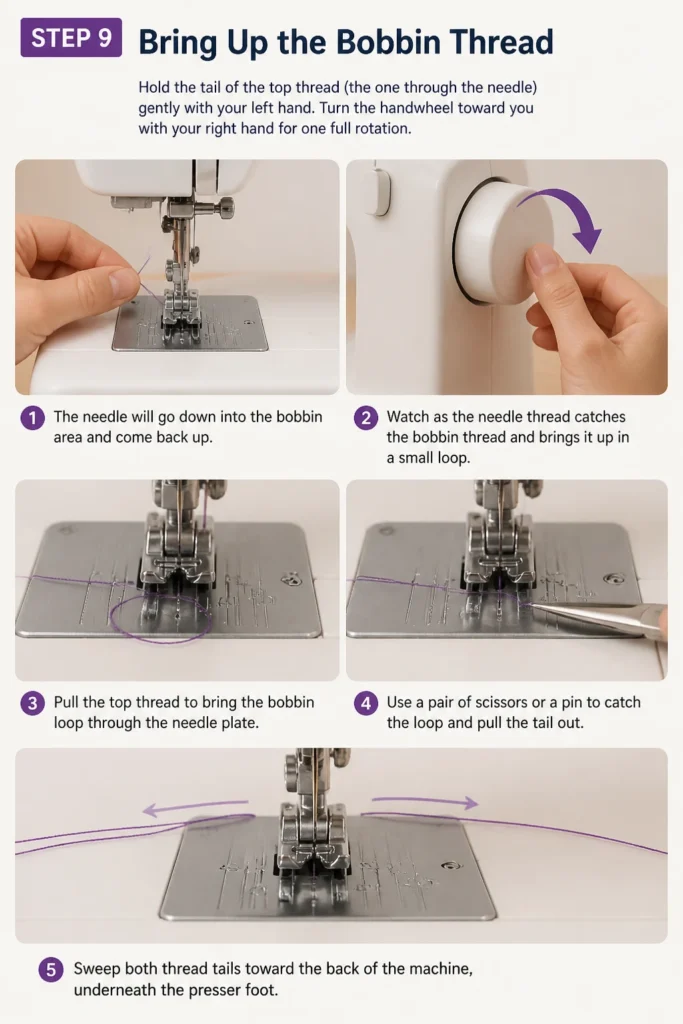
Turn the handwheel toward you with your right hand for one full rotation.
The needle will go down into the bobbin area and come back up.
Watch as the needle thread catches the bobbin thread and brings it up in a small loop.
Pull the top thread to bring the bobbin loop through the needle plate.
Use a pair of scissors or a pin to catch the loop and pull the tail out.
Sweep both thread tails toward the back of the machine, underneath the presser foot.
Common Mistakes to Avoid
Threading with the Presser Foot Down
This is the most common error beginners make because it seems more stable.
When the presser foot is down, the tension disks are squeezed shut, preventing the thread from sitting between them.
This results in “bird-nesting,” where a massive tangle of thread forms on the underside of your fabric.
Missing the Take-Up Lever
It is easy to skip the take-up lever if you are moving too fast through the steps.
If the thread is not hooked through this lever, there is nothing to pull the slack out of the stitch.
The machine will jam almost instantly, and you may even bend your needle.
Using the Wrong Bobbin Type
Bobbins may look similar, but slight differences in height or material can cause issues.
A plastic bobbin in a machine designed for metal bobbins can cause tension fluctuations.
Always check your manual to ensure you are using Class 15, Class 66, or the specific size required.
Troubleshooting
The Thread Keeps Snapping
If the thread breaks repeatedly, check the needle for any burrs or sharp nicks.
A damaged needle can shred the thread as it passes through the eye.
Also, ensure the thread is not caught on the notch of the spool or wrapped around the spool pin.
Loops Forming on the Bottom of the Fabric
Contrary to what you might think, loops on the bottom usually mean there is a problem with the top thread.
Re-thread the entire top path, making sure the presser foot is up and the thread is in the tension disks.
If the top thread has no tension, it will simply fall through the fabric and pile up underneath.
The Needle Unthreads Itself
This usually happens if you start sewing without enough of a thread tail.
Always ensure you have at least 5 or 6 inches of thread pulled behind the machine before starting.
Check that the take-up lever is at its highest point when you begin your first stitch.
Key Takeaways
- Always raise the presser foot before threading the top of the machine.
- Turn the handwheel toward you to avoid damaging the internal timing.
- Follow the numbered guides on the machine casing for the correct path.
- Ensure the bobbin is rotating in the direction specified by the manufacturer.
- Pull both thread tails to the back and under the foot before you start sewing.
- Use high-quality thread to prevent excess lint buildup and breakage.
Frequently Asked Questions
Does it matter which way the spool faces?
Yes, the direction the thread comes off the spool can affect the tension. Most horizontal spool pins work best when the thread comes off the top and toward the back. Check your machine’s manual or the small diagram near the spool pin for the exact orientation.
How often should I re-thread my machine?
You should re-thread whenever you change your thread color or if you notice any stitch quality issues. It is also a good habit to re-thread the top and bottom if the machine has been sitting idle for a few weeks. Dust and temperature changes can occasionally cause the thread to shift out of the guides.
Why is my needle threader not working?
The tiny hook on an automatic needle threader is very delicate and can easily become bent. Ensure the needle is at the exact height required for the threader to align with the eye. If the needle is slightly too high or too low, the hook will hit the metal of the needle instead of passing through the eye.
Can I use the same thread for the top and the bobbin?
In almost all cases, you should use the exact same thread in both the top and the bobbin. Using different weights or types of thread can cause the tension to become unbalanced. This leads to puckered seams or stitches that look different on the front and back of the project.
Our Top Recommended Finds
- High-Quality Polyester Thread: Brands like Gutermann or Coats & Clark produce smoother thread with fewer fibers that can clog your machine.
- Needle Threading Tool: A handheld wire threader is a lifesaver if your machine does not have a built-in automatic threader.
- Magnetic Pin Cushion: This keeps your pins organized and within reach, preventing them from falling into the machine’s moving parts.
Mastering Your Machine One Step At A Time
Now that your machine is properly threaded, you are ready to start your first project.
Practice threading several times in a row until the movements feel like second nature.
Once you are comfortable, try sewing on a scrap piece of fabric to test your tension settings.
Take a look at our guides on basic stitches or choosing the right fabric to continue your sewing journey today.