How To Shorten Pants Without Sewing
You just bought a fantastic new pair of pants, but they’re a little too long.
Maybe your child grew, and their favorite jeans now drag on the floor.
I’ve been there countless times, needing a quick fix without pulling out the sewing machine, and these methods have saved many outfits.
Quick Overview
This guide will show you how to quickly and effectively shorten pants using simple no-sew techniques.
You’ll achieve a neat, professional-looking hem without any needles or thread.
- Time needed: 30-60 minutes (depending on method and experience)
- Difficulty: Beginner
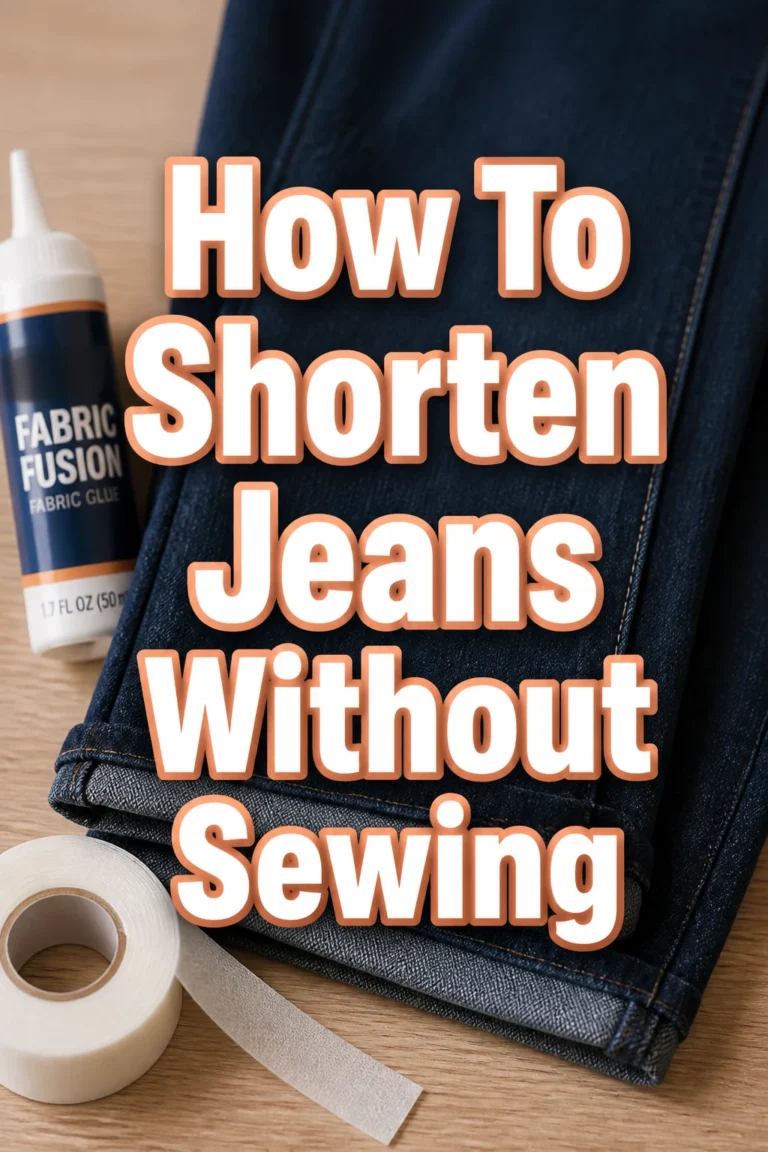
- What you’ll need: Tape measure, sharp scissors, iron, hem tape or fabric glue
Step-by-Step Instructions
Step 1: Gather Your Tools
Collect all the necessary items before you begin.
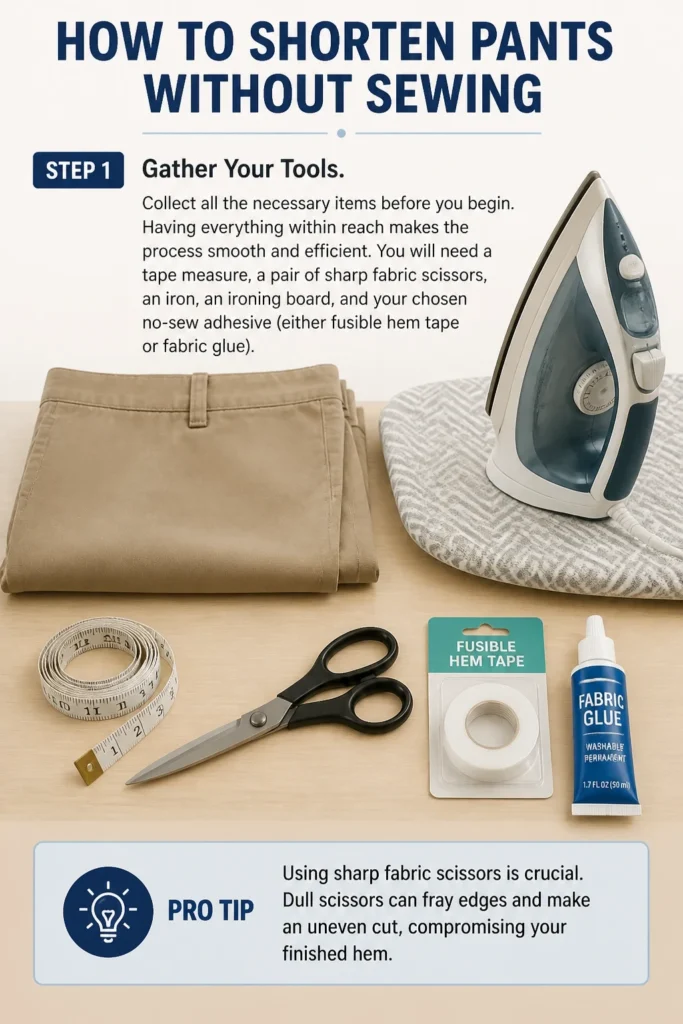
Having everything within reach makes the process smooth and efficient.
You will need a tape measure, a pair of sharp fabric scissors, an iron, an ironing board, and your chosen no-sew adhesive (either fusible hem tape or fabric glue).
Pro Tip: Using sharp fabric scissors is crucial. Dull scissors can fray edges and make an uneven cut, compromising your finished hem.
Step 2: Try On and Pin the New Length
Put on the pants you want to shorten.
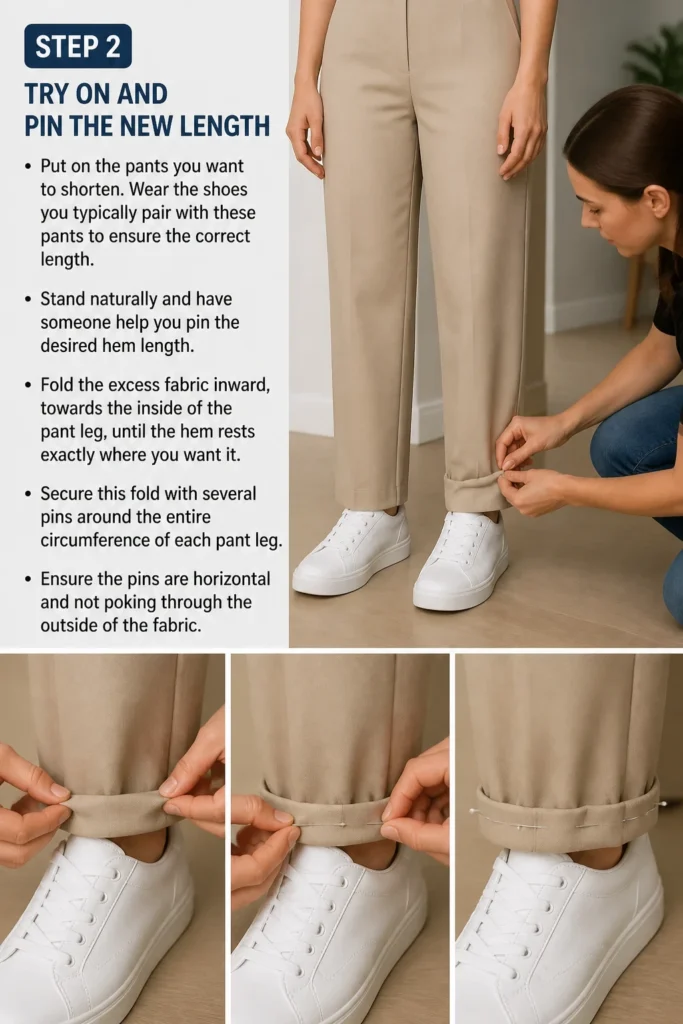
Wear the shoes you typically pair with these pants to ensure the correct length.
Stand naturally and have someone help you pin the desired hem length.
Fold the excess fabric inward, towards the inside of the pant leg, until the hem rests exactly where you want it.
Secure this fold with several pins around the entire circumference of each pant leg.
Ensure the pins are horizontal and not poking through the outside of the fabric.
Step 3: Mark and Remove Excess Fabric
Carefully take off the pants without disturbing the pins.
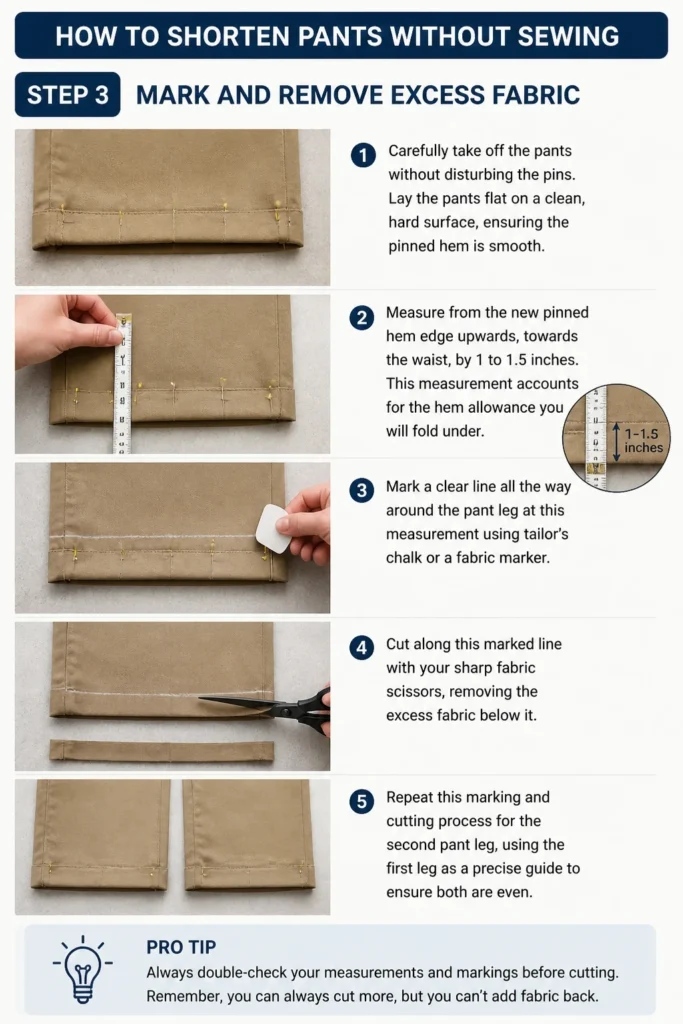
Lay the pants flat on a clean, hard surface, ensuring the pinned hem is smooth.
Measure from the new pinned hem edge upwards, towards the waist, by 1 to 1.5 inches.
This measurement accounts for the hem allowance you will fold under.
Mark a clear line all the way around the pant leg at this measurement using tailor’s chalk or a fabric marker.
Cut along this marked line with your sharp fabric scissors, removing the excess fabric below it.
Repeat this marking and cutting process for the second pant leg, using the first leg as a precise guide to ensure both are even.
Pro Tip: Always double-check your measurements and markings before cutting. Remember, you can always cut more, but you can’t add fabric back.
Step 4: Prepare the Hem Edges
Unfold the raw edge you just cut.
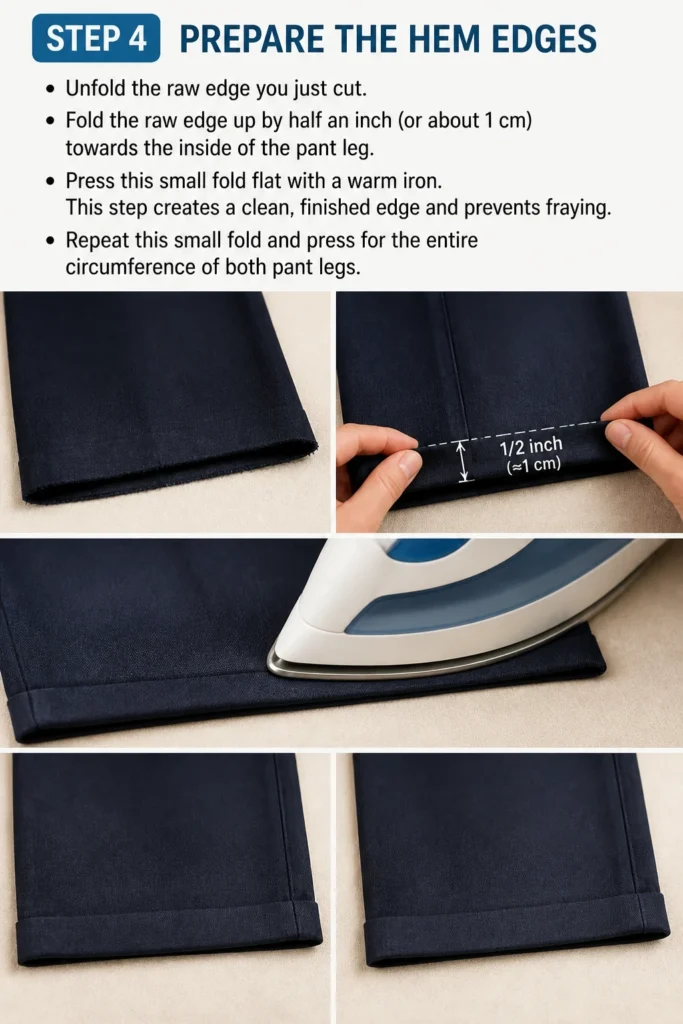
Fold the raw edge up by half an inch (or about 1 cm) towards the inside of the pant leg.
Press this small fold flat with a warm iron.
This step creates a clean, finished edge and prevents fraying.
Repeat this small fold and press for the entire circumference of both pant legs.
Step 5: Create the Final Hem Fold
Fold the hem up again, this time to the final desired length, enclosing the raw edge you just pressed.
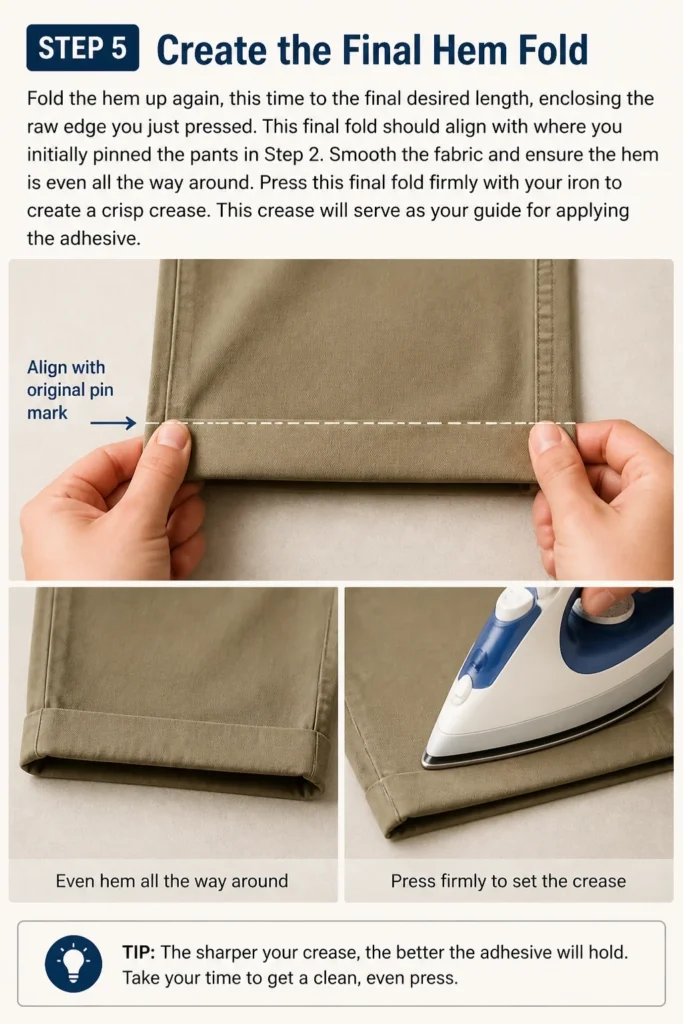
This final fold should align with where you initially pinned the pants in Step 2.
Smooth the fabric and ensure the hem is even all the way around.
Press this final fold firmly with your iron to create a crisp crease.
This crease will serve as your guide for applying the adhesive.
Step 6: Apply Fusible Hem Tape (Method 1)
If you’re using fusible hem tape, unfold the final hem crease slightly so you can access the inside fold.
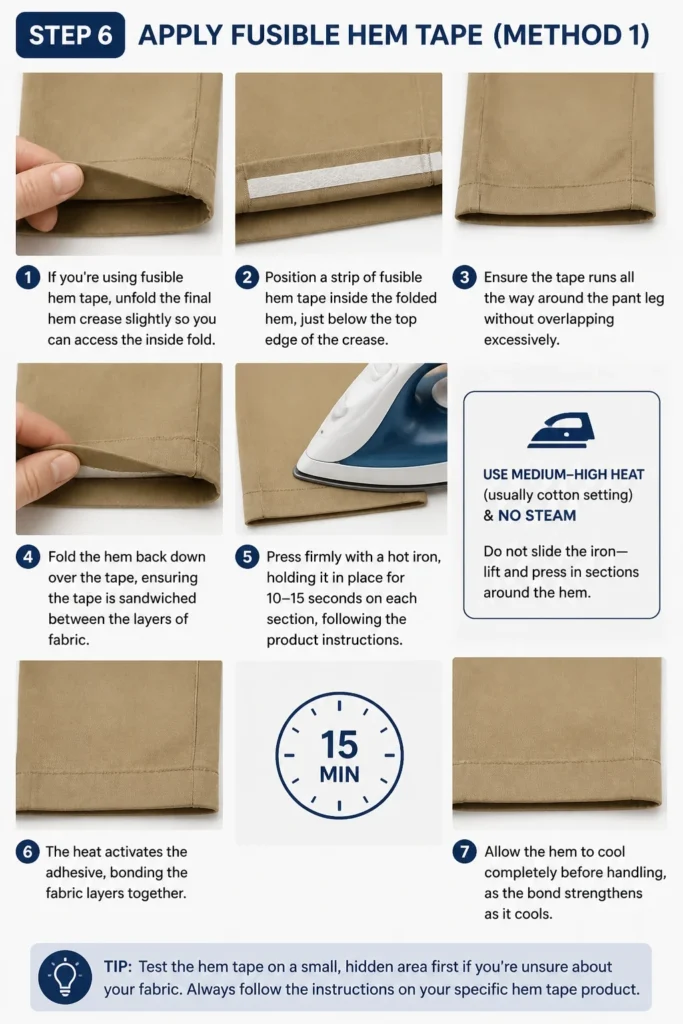
Position a strip of fusible hem tape inside the folded hem, just below the top edge of the crease.
Ensure the tape runs all the way around the pant leg without overlapping excessively.
Fold the hem back down over the tape, ensuring the tape is sandwiched between the layers of fabric.
Press firmly with a hot iron, holding it in place for 10-15 seconds on each section, following the product instructions.
The heat activates the adhesive, bonding the fabric layers together.
Allow the hem to cool completely before handling, as the bond strengthens as it cools.
Step 7: Apply Fabric Glue (Method 2)
If you’re using fabric glue, unfold the final hem crease slightly.
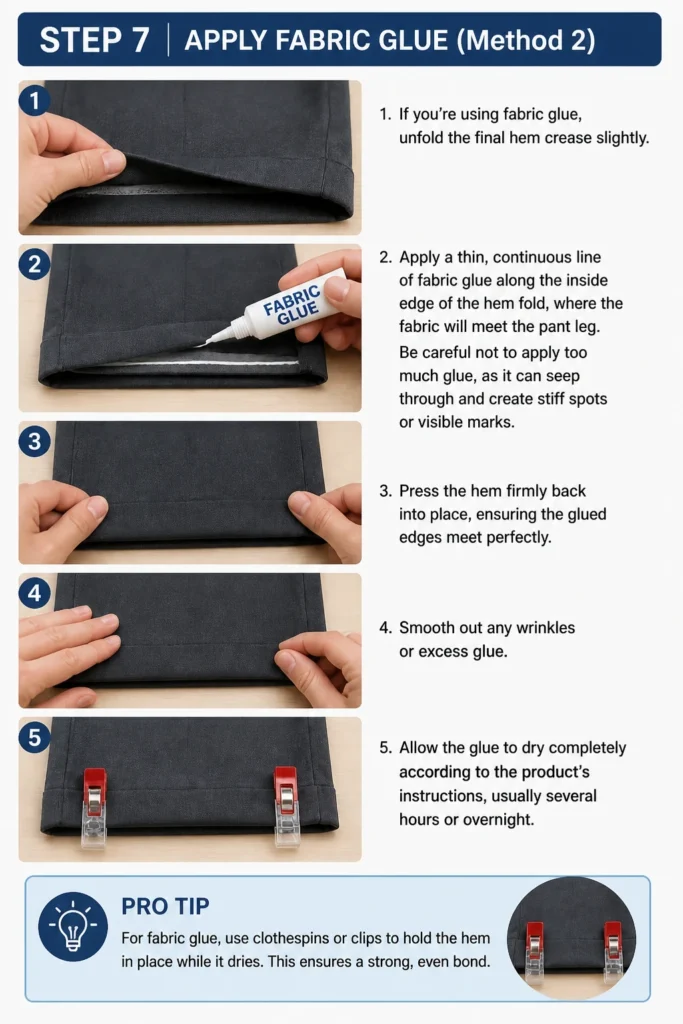
Apply a thin, continuous line of fabric glue along the inside edge of the hem fold, where the fabric will meet the pant leg.
Be careful not to apply too much glue, as it can seep through and create stiff spots or visible marks.
Press the hem firmly back into place, ensuring the glued edges meet perfectly.
Smooth out any wrinkles or excess glue.
Allow the glue to dry completely according to the product’s instructions, usually several hours or overnight.
Pro Tip: For fabric glue, use clothespins or clips to hold the hem in place while it dries. This ensures a strong, even bond.
Step 8: Final Inspection and Wear
Once the hem tape has cooled or the fabric glue has fully dried, inspect your work.
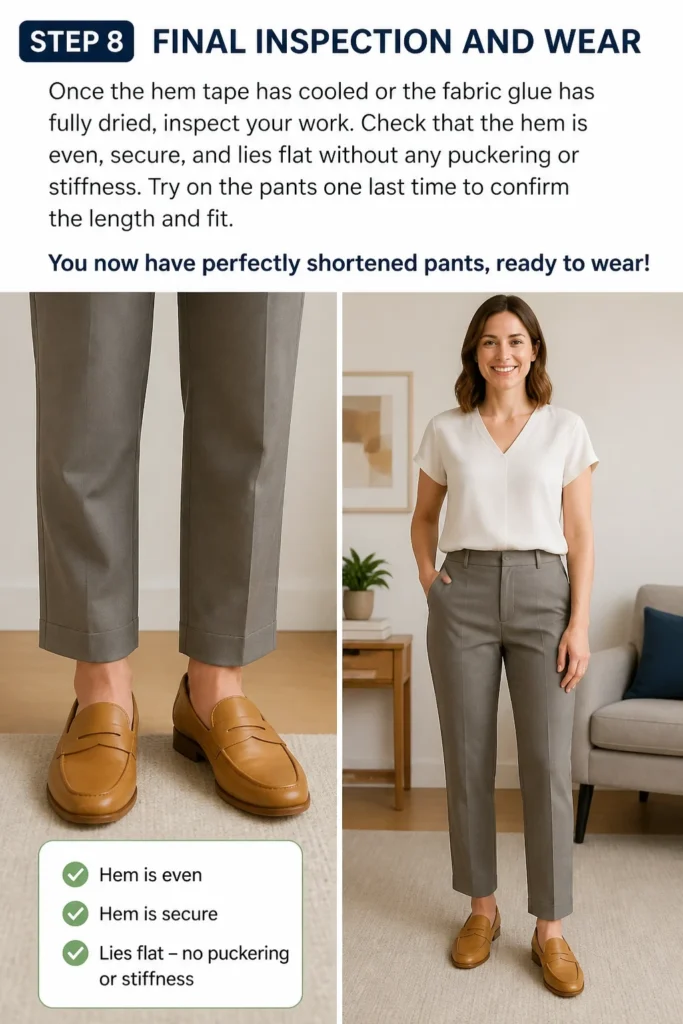
Check that the hem is even, secure, and lies flat without any puckering or stiffness.
Try on the pants one last time to confirm the length and fit.
You now have perfectly shortened pants, ready to wear!
Common Mistakes to Avoid
Cutting Too Much Fabric
A common pitfall is cutting off too much length in the initial trimming stage. Once fabric is cut, it cannot be reattached, making the pants permanently too short.
Always measure twice, cut once, and err on the side of leaving a little extra length if you are unsure. You can always trim more later.
Uneven Hems
Failing to measure and mark accurately on both pant legs can result in an uneven hem. One leg might appear longer than the other, or the hem might dip in places.
Take your time during the pinning and marking stages, ensuring consistency around each leg and between both legs. Using a flat surface and a reliable tape measure helps immensely.
Not Pressing Properly
Whether you’re using hem tape or just creating sharp creases, inadequate pressing can lead to a sloppy finish. The hem might not lie flat, or the adhesive might not bond securely.
Always use an iron at the appropriate temperature for your fabric, apply firm, even pressure, and allow sufficient time for the heat to activate the adhesive or set the crease.
Using the Wrong Adhesive
Not all no-sew adhesives are created equal or suitable for every fabric type. Using a glue that is too stiff, not washable, or incompatible with your fabric can lead to disappointment.
Read product labels carefully. Choose washable hem tape or fabric glue specifically designed for clothing and suitable for the material of your pants (e.g., denim, cotton, synthetics).
Troubleshooting
Hem Not Holding
If your hem tape isn’t sticking or fabric glue isn’t bonding, the most likely issue is insufficient heat or pressure during application, or not enough drying time for glue.
Re-press the hem tape with more heat and pressure, ensuring you hold the iron in place for the recommended time. For glue, apply a very thin second layer, re-press, and extend the drying period.
Hem Looks Bulky or Stiff
A bulky or stiff hem usually indicates too much fabric allowance, too much adhesive, or improper folding of the raw edge.
Ensure your initial hem allowance (the 1 to 1.5 inches you cut) is not excessive for the fabric. Use only a thin, even layer of fabric glue or a single strip of hem tape. Double-check that the raw edge was folded under neatly before the final hem fold.
Uneven Appearance After Washing
Sometimes, a no-sew hem might warp or pucker after its first wash. This often happens if the fabric was not pre-shrunk or if the adhesive isn’t truly washable.
Always pre-wash new fabric or pants before hemming. Ensure your chosen hem tape or fabric glue is explicitly labeled as “washable.” If the issue persists, consider redoing the hem with a different product.
Key Takeaways
- Accurate measuring and marking are the foundation of a successful no-sew hem.
- Always try on pants with the intended shoes for the perfect length.
- Sharp fabric scissors prevent fraying and ensure clean cuts.
- Pressing with an iron is critical for crisp creases and secure adhesive bonds.
- Choose the right no-sew adhesive (tape or glue) for your fabric type and desired durability.
- Allow adequate cooling or drying time for the adhesive to fully set.
Frequently Asked Questions
Can I shorten any type of pants without sewing?
Most cotton, denim, linen, and synthetic blend pants are excellent candidates for no-sew hemming. Thicker fabrics like heavy denim might require a stronger adhesive, while very delicate or slippery fabrics like silk or chiffon can be more challenging but still possible with care.
How long do no-sew hems typically last?
The durability of a no-sew hem depends on the quality of the adhesive, the fabric, and how often the pants are worn and washed. Good quality fusible hem tape or fabric glue can last many washes and months of wear. However, they might eventually need reapplication, especially in high-stress areas.
Can I wash pants that have been shortened with no-sew methods?
Yes, most reputable no-sew hem tapes and fabric glues are designed to be washable. Always check the product packaging for specific care instructions, including recommended washing temperatures and drying methods, to ensure the longevity of your hem.
Is it possible to undo a no-sew hem if I make a mistake?
Undoing a no-sew hem can be challenging but sometimes possible. For fusible hem tape, reheating with an iron might loosen the bond enough to separate the fabric. Fabric glue, once dry, is often permanent, but some types can be carefully peeled or scraped off, though this risks damaging the fabric.
Embrace Your Inner DIYer
Mastering the art of no-sew pant shortening empowers you to tailor your wardrobe to perfection.
It’s a practical skill that saves time and money, giving you confidence in every step.
Don’t let ill-fitting clothing hold you back; take control and customize your style today.
Consider exploring other no-sew alterations, like fixing a ripped seam or adding decorative fabric accents.