How To Shorten Jeans Without Sewing
Have you ever bought a pair of jeans only to find them dragging on the floor? It is a common frustration, especially if you lack sewing skills or a machine.
I have been there myself, staring at a perfect pair of jeans that were just a few inches too long. That is why I perfected this no-sew method.
This guide will show you how to get that ideal length, easily and effectively, without ever touching a needle and thread.
Quick Overview
This guide will walk you through transforming your ill-fitting jeans into a custom-length pair. You will achieve a neat, durable hem without any sewing.
- Time needed: 45-75 minutes (including drying time)
- Difficulty: Beginner
- What you’ll need: Jeans, measuring tape, scissors, iron, fabric glue or hem tape
Step-by-Step Instructions
Step 1: Try On and Mark Your Desired Length
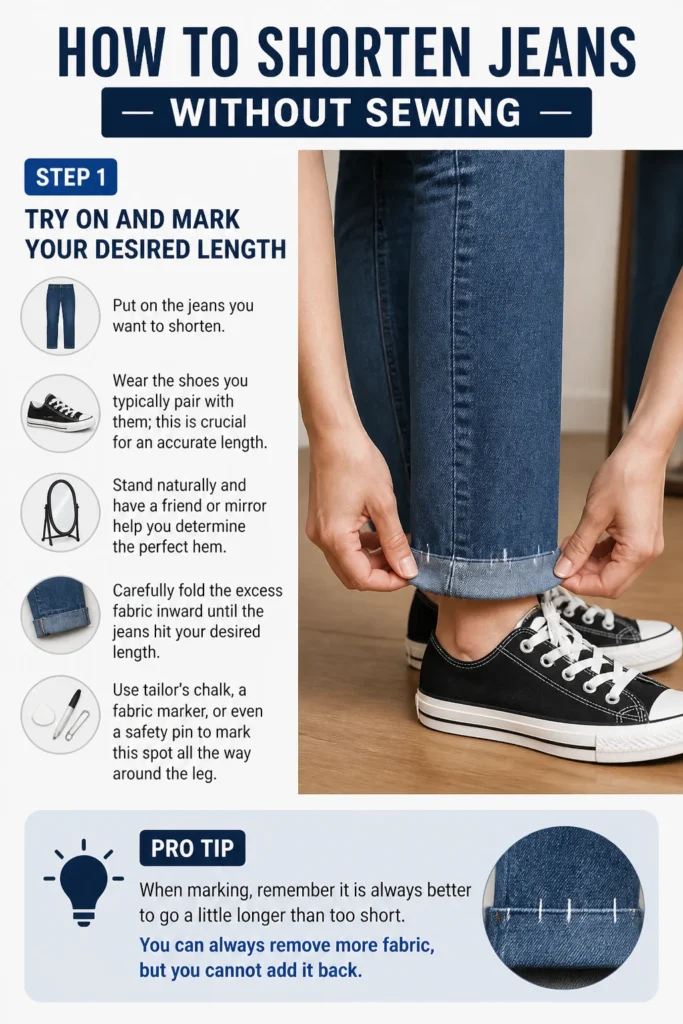
Put on the jeans you want to shorten. Wear the shoes you typically pair with them; this is crucial for an accurate length. Stand naturally and have a friend or mirror help you determine the perfect hem.
Carefully fold the excess fabric inward until the jeans hit your desired length. Use tailor’s chalk, a fabric marker, or even a safety pin to mark this spot all the way around the leg.
Pro Tip: When marking, remember it is always better to go a little longer than too short. You can always remove more fabric, but you cannot add it back.
Step 2: Remove Jeans and Prepare for Measuring
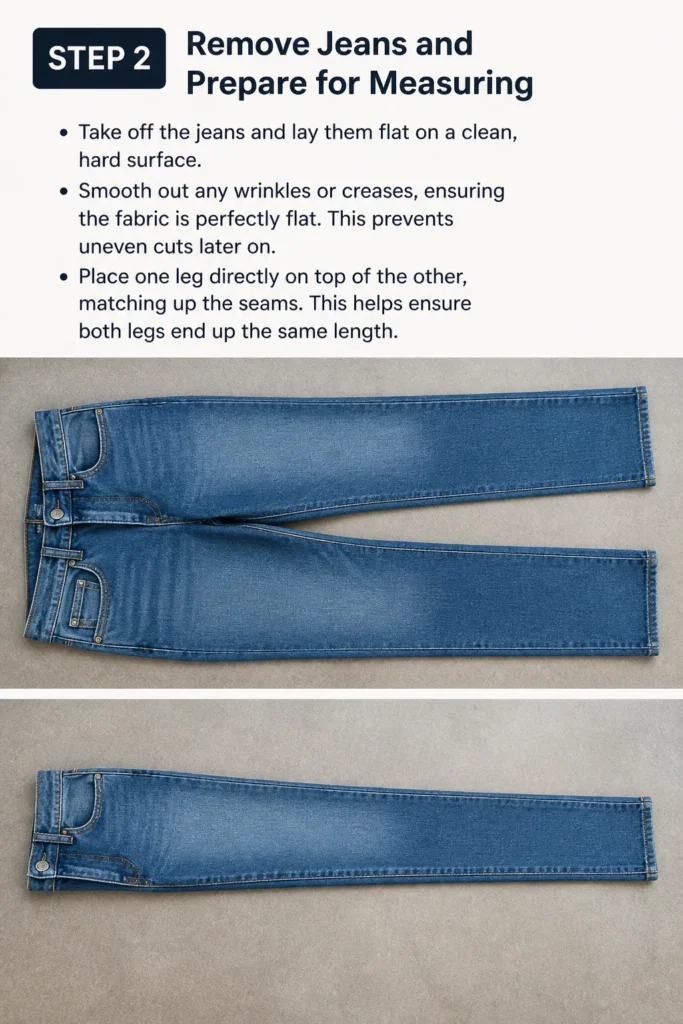
Take off the jeans and lay them flat on a clean, hard surface. Smooth out any wrinkles or creases, ensuring the fabric is perfectly flat. This prevents uneven cuts later on.
Place one leg directly on top of the other, matching up the seams. This helps ensure both legs end up the same length.
Step 3: Measure and Mark the Cut Line
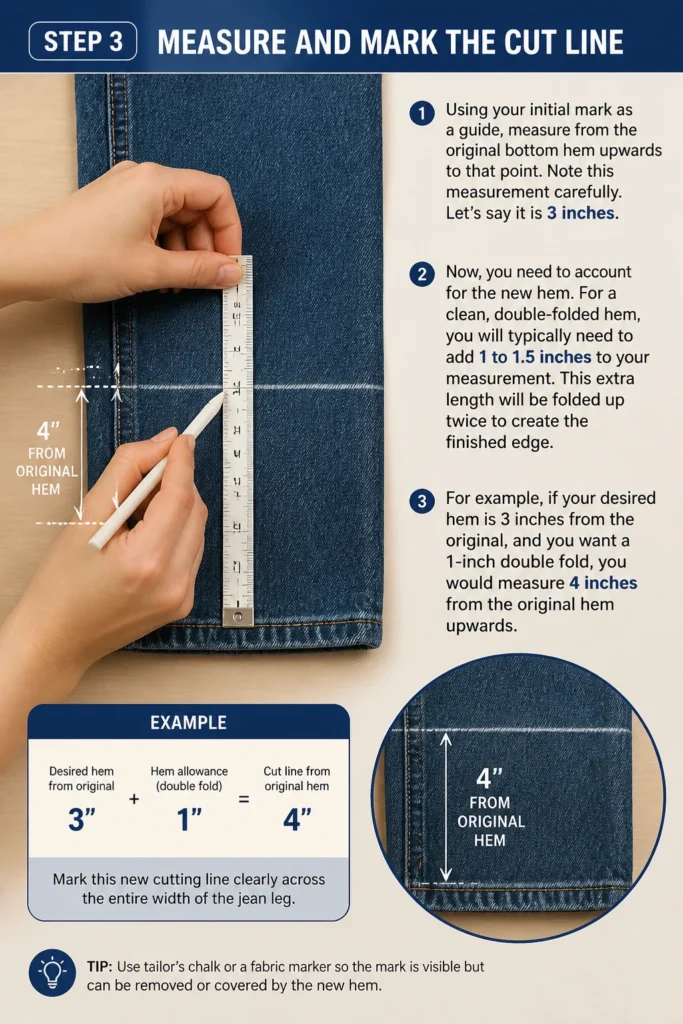
Using your initial mark as a guide, measure from the original bottom hem upwards to that point. Note this measurement carefully. Let’s say it is 3 inches.
Now, you need to account for the new hem. For a clean, double-folded hem, you will typically need to add 1 to 1.5 inches to your measurement. This extra length will be folded up twice to create the finished edge.
For example, if your desired hem is 3 inches from the original, and you want a 1-inch double fold, you would measure 4 inches from the original hem upwards. Mark this new cutting line clearly across the entire width of the jean leg.
Step 4: Cut the Excess Fabric
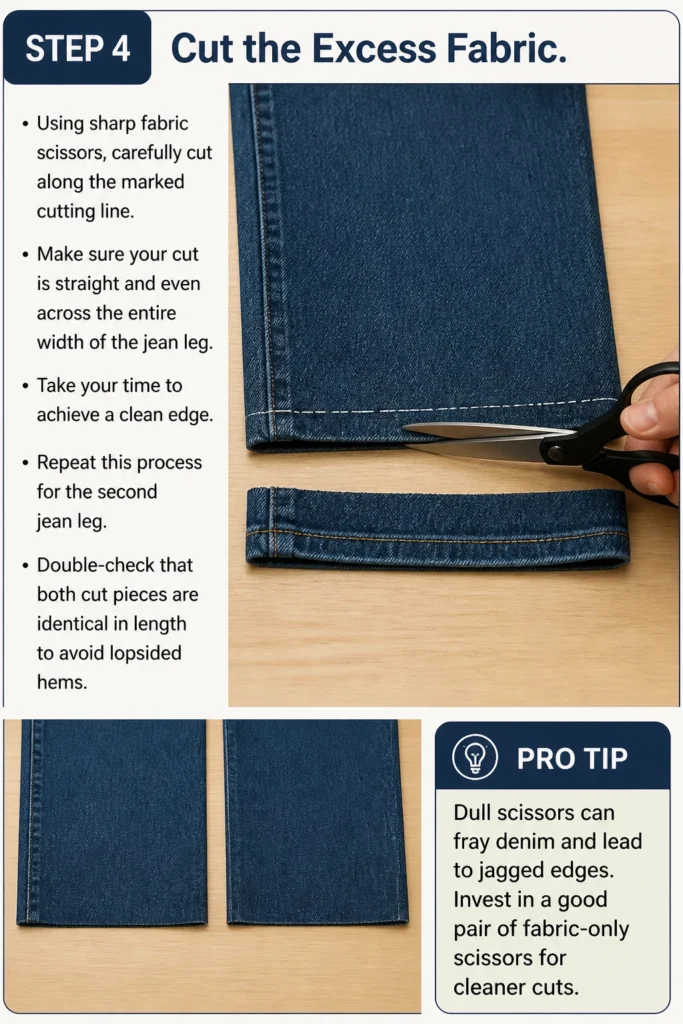
Using sharp fabric scissors, carefully cut along the marked cutting line. Make sure your cut is straight and even across the entire width of the jean leg. Take your time to achieve a clean edge.
Repeat this process for the second jean leg. Double-check that both cut pieces are identical in length to avoid lopsided hems.
Pro Tip: Dull scissors can fray denim and lead to jagged edges. Invest in a good pair of fabric-only scissors for cleaner cuts.
Step 5: Prepare the New Hem by Folding and Pressing
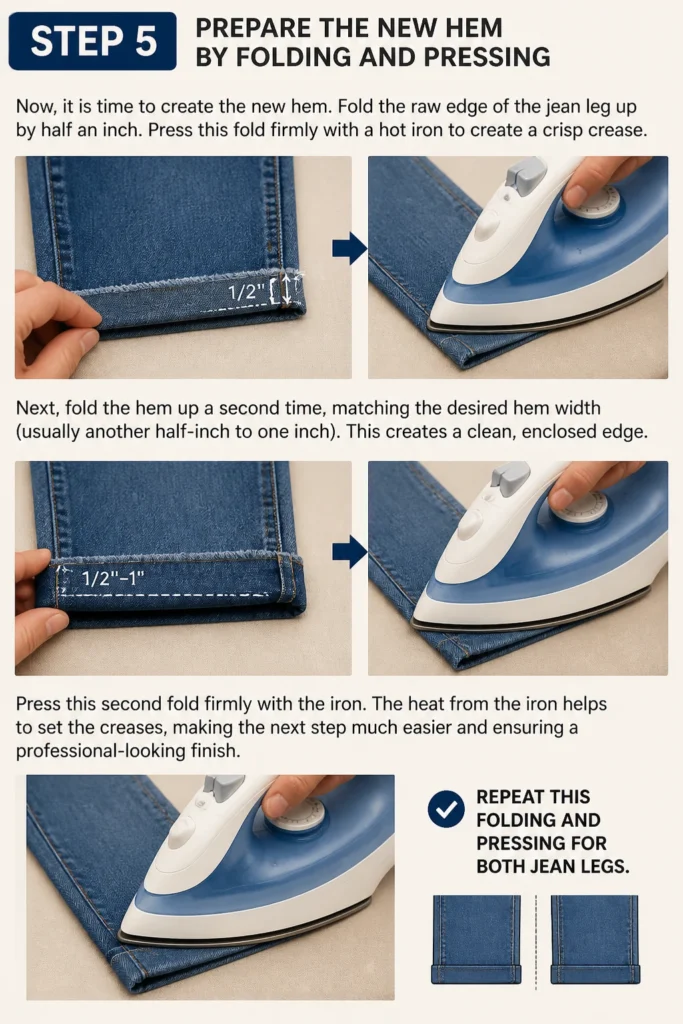
Now, it is time to create the new hem. Fold the raw edge of the jean leg up by half an inch. Press this fold firmly with a hot iron to create a crisp crease.
Next, fold the hem up a second time, matching the desired hem width (usually another half-inch to one inch). This creates a clean, enclosed edge. Press this second fold firmly with the iron.
The heat from the iron helps to set the creases, making the next step much easier and ensuring a professional-looking finish. Repeat this folding and pressing for both jean legs.
Step 6: Apply Fabric Adhesive
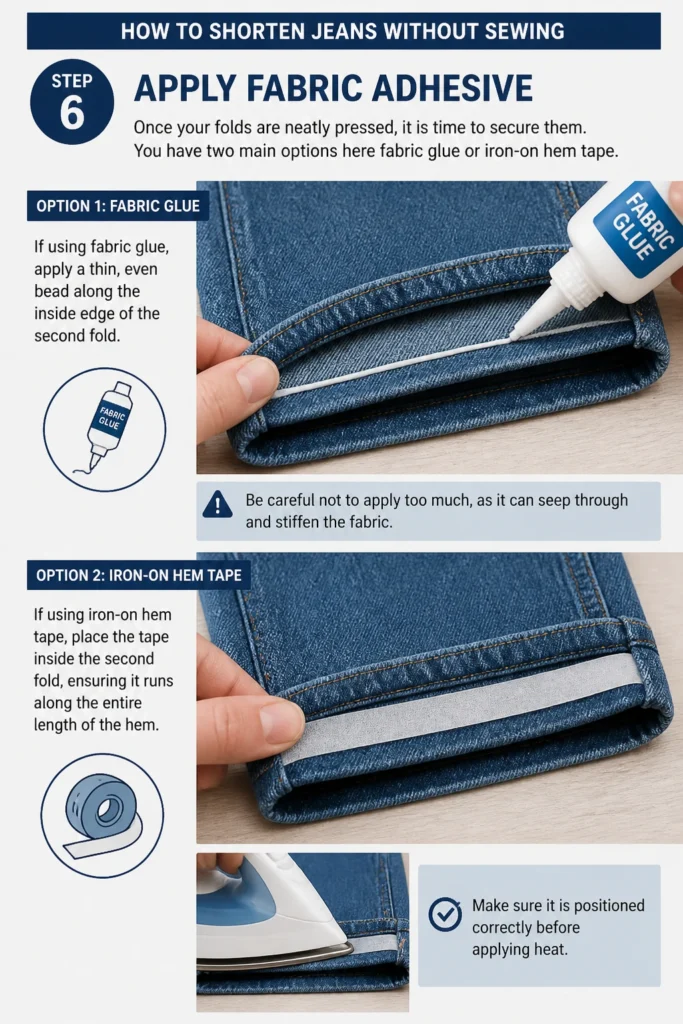
Once your folds are neatly pressed, it is time to secure them. You have two main options here: fabric glue or iron-on hem tape.
If using fabric glue, apply a thin, even bead along the inside edge of the second fold. Be careful not to apply too much, as it can seep through and stiffen the fabric.
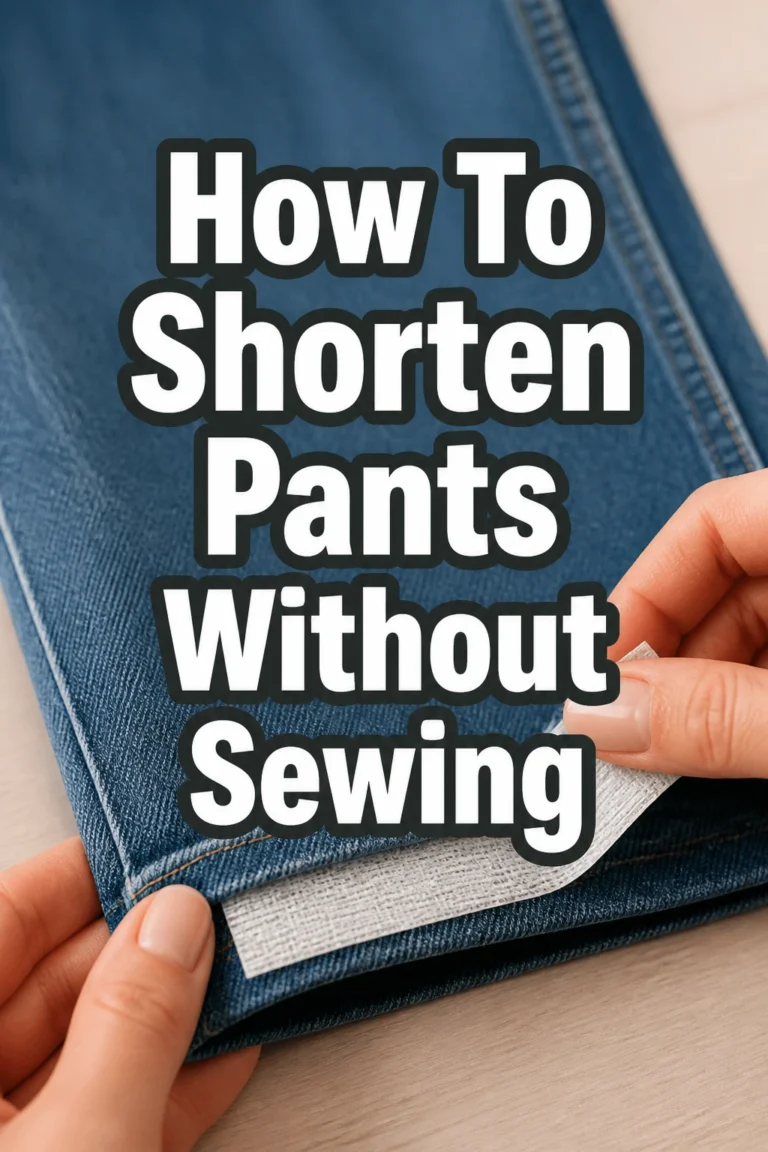
If using iron-on hem tape, place the tape inside the second fold, ensuring it runs along the entire length of the hem. Make sure it is positioned correctly before applying heat.
Step 7: Secure the Hem
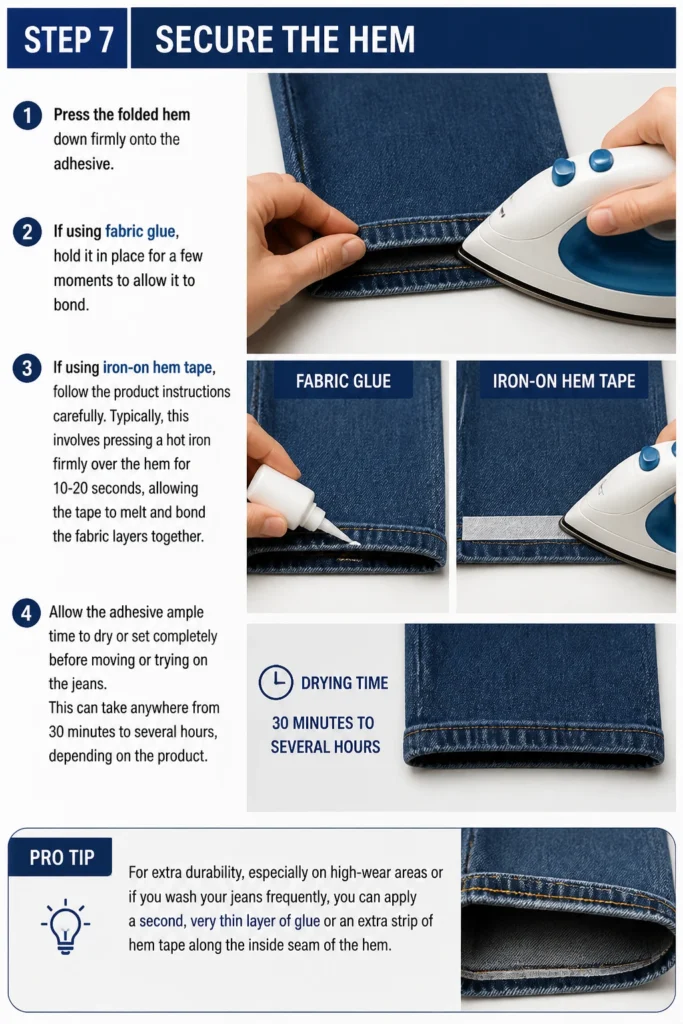
Press the folded hem down firmly onto the adhesive. If using fabric glue, hold it in place for a few moments to allow it to bond.
If using iron-on hem tape, follow the product instructions carefully. Typically, this involves pressing a hot iron firmly over the hem for 10-20 seconds, allowing the tape to melt and bond the fabric layers together.
Allow the adhesive ample time to dry or set completely before moving or trying on the jeans. This can take anywhere from 30 minutes to several hours, depending on the product.
Pro Tip: For extra durability, especially on high-wear areas or if you wash your jeans frequently, you can apply a second, very thin layer of glue or an extra strip of hem tape along the inside seam of the hem.
Step 8: Final Inspection and Enjoy
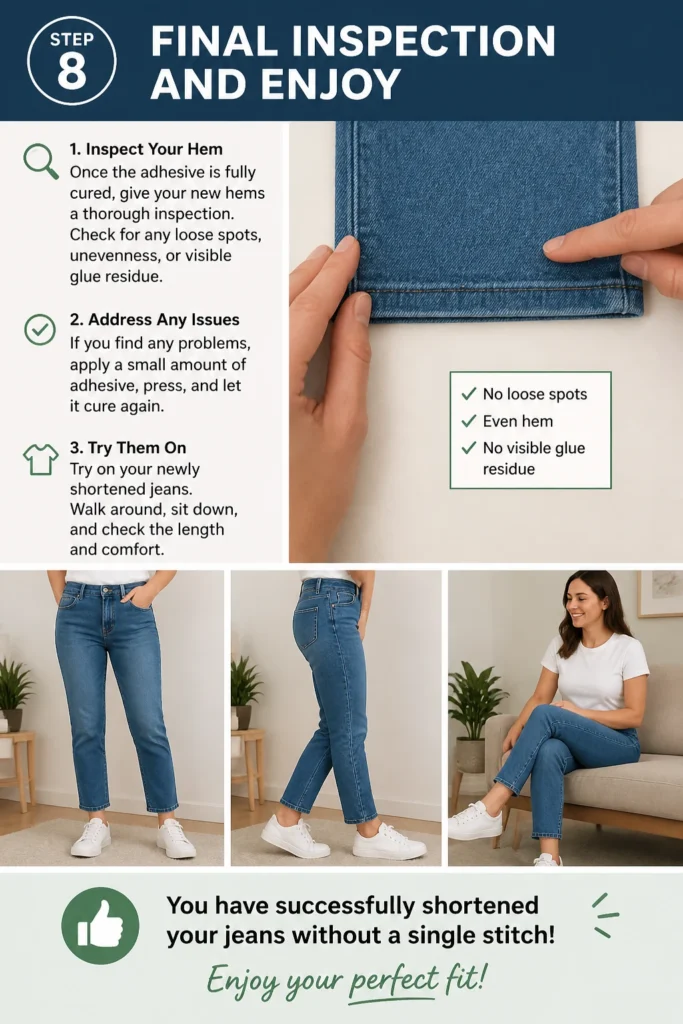
Once the adhesive is fully cured, give your new hems a thorough inspection. Check for any loose spots, unevenness, or visible glue residue. Address any issues before wearing.
Try on your newly shortened jeans. Walk around, sit down, and check the length and comfort. You have successfully shortened your jeans without a single stitch!
Common Mistakes to Avoid
Cutting Too Short Initially
A common pitfall is cutting the jeans too short from the start. Once fabric is removed, it is gone forever. Always re-measure and err on the side of caution, leaving a little extra length if you are unsure. You can always trim more later, but you cannot add it back.
Uneven Cuts and Frayed Edges
Cutting freehand or with dull scissors often leads to jagged, uneven edges. This makes folding difficult and can result in a messy-looking hem. Always use sharp fabric scissors and a ruler to ensure a straight, clean cut across both legs.
Not Pressing Creases Properly
Skipping the ironing step or not pressing firmly enough is another mistake. Crisp, well-defined creases are essential for a neat, straight hem. Without proper pressing, your folds will be inconsistent, making the adhesive application much harder and the final result less professional.
Applying Too Much Adhesive
Over-applying fabric glue can cause it to seep through the denim, leaving visible, stiff, and sometimes shiny marks on the outside of your jeans. Use a thin, even bead of glue, or ensure your hem tape is correctly positioned to prevent excess. Less is often more with adhesives.
Troubleshooting
Hem Coming Undone After Washing
If your hem starts to detach after washing, the adhesive might not have been applied correctly or enough was used. It could also be that the specific adhesive was not strong enough for denim or frequent washing.
To fix this, carefully re-apply more fabric glue or a fresh strip of hem tape to the affected area. Ensure the surface is clean and dry before application. Consider using a heavy-duty fabric glue designed for denim or permanent bonds for better durability.
Hem Looks Stiff or Has Visible Glue Marks
Stiffness or visible marks usually means too much fabric glue was used, or it seeped through the fabric. This can also happen if the glue is not fully dried before wear or washing.
Try gently working the fabric to soften it. If glue marks are visible, you might try a fabric cleaner designed for adhesive removal on a small, inconspicuous area first. In the future, always use a thin, even application of glue and allow ample drying time. Using iron-on hem tape can also help avoid visible glue.
Finished Hem Is Uneven
An uneven hem is typically a result of inaccurate measuring or cutting. It can also happen if the jeans were not laid flat and smoothed completely before marking.
If the unevenness is minor, you might be able to carefully trim a small amount from the longer side. For significant differences, you may need to undo the hem on one or both legs, re-measure, re-cut, and re-apply the adhesive. Always double-check your measurements and cuts before securing the hem.
Key Takeaways
- Always try on your jeans with preferred shoes for the most accurate length measurement.
- Measure twice and cut once, always erring on the side of leaving a little extra length.
- Use sharp fabric scissors to ensure clean, straight cuts and prevent fraying.
- Pressing your folds firmly with an iron creates crisp creases essential for a neat hem.
- Apply fabric glue or hem tape sparingly and evenly to avoid stiffness or visible marks.
- Allow ample drying or setting time for the adhesive to ensure a strong, lasting bond.
Frequently Asked Questions
How long does this no-sew hem method typically last?
The longevity of a no-sew hem depends on several factors, including the quality of the fabric adhesive used, how often the jeans are worn, and how they are washed. With good quality fabric glue or hem tape, and careful application, a no-sew hem can last for many months, even years, through numerous washes.
Can I wash my jeans after shortening them without sewing?
Yes, you can absolutely wash your jeans after shortening them with this method. It is crucial, however, to follow the specific care instructions for the fabric glue or hem tape you used. Most adhesives recommend waiting a full 24-72 hours before the first wash to allow for complete curing. Washing on a gentle cycle with cold water and air-drying can also help extend the life of your no-sew hem.
Does this method work on all types of denim and fabric?
This no-sew method works best on traditional denim and other medium-weight woven fabrics. It can be less effective on very thin, stretchy, or delicate fabrics, as the adhesive might show through or not hold as strongly. For very thick or stiff denim, you might need a stronger, heavy-duty fabric glue.
Will a no-sew hem look as professional as a sewn hem?
While a carefully executed no-sew hem can look very neat and clean, it will not be identical to a professionally sewn hem. A sewn hem offers a distinct stitch line and often a more flexible finish. However, for everyday wear and a quick, practical solution, a no-sew hem can look surprisingly polished and is often indistinguishable to the casual observer.
Our Top Recommended Finds
- Sharp Fabric Scissors: A dedicated pair of fabric scissors ensures clean, precise cuts without fraying your denim. They make a huge difference in the final look.
- Permanent Fabric Glue: Look for a strong, clear-drying fabric glue specifically designed for permanent bonds on denim and heavy fabrics. This provides a durable hold.
- Iron-On Hem Tape: This convenient adhesive tape melts with heat, creating a secure, flat hem. It is an excellent alternative to liquid glue, often providing a very clean finish.
Embrace Your Perfect Fit Today
No more tripping over too-long jeans or spending money on alterations. This no-sew method empowers you to achieve a custom fit right in your own home. It is a simple skill that delivers impressive results.
Gather your tools and give it a try. You will be amazed at how easy it is to transform your wardrobe. Once you master this, consider exploring other no-sew clothing adjustments for even more confidence in your style.